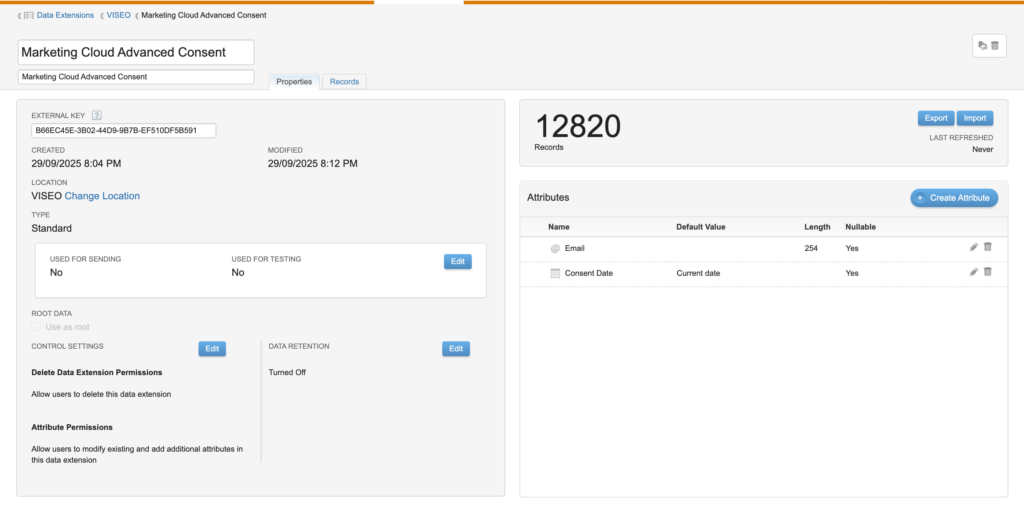
Step 1: Create Data Extension #
Begin by setting up a Data Extension in Marketing Cloud Engagement with the following field attributes:
- Email – Email address of the subscriber
- Consent Date – Date when consent was provided
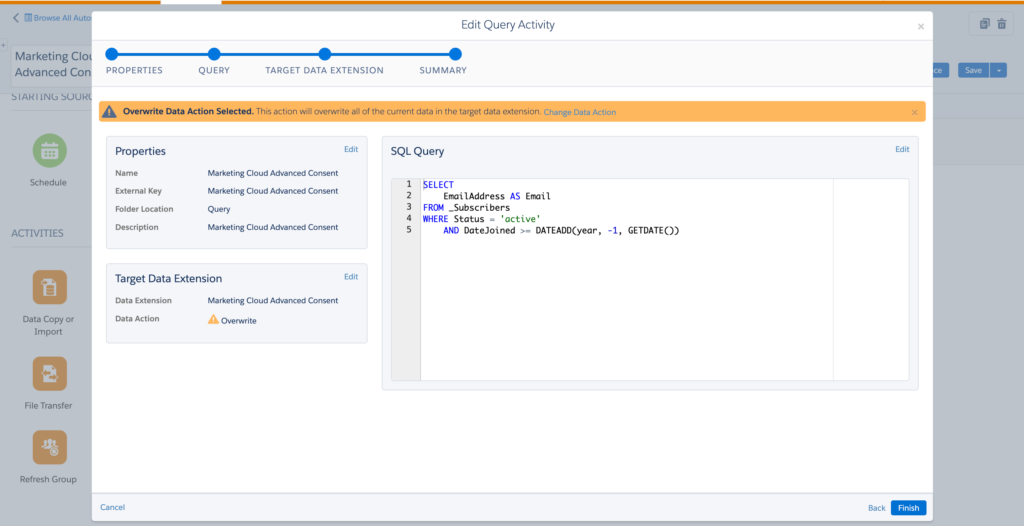
Step 2: Configure Automation Studio #
Create an automation in Marketing Cloud Engagement to retrieve all active subscribers from the past year.
SQL Query #
Use the following SQL query to extract active subscribers:
SELECT
    EmailAddress AS Email
FROM _Subscribers
WHERE Status = 'active'
    AND DateJoined >= DATEADD(year, -1, GETDATE())
Note: This query filters for subscribers with an active status who joined within the last 12 months.
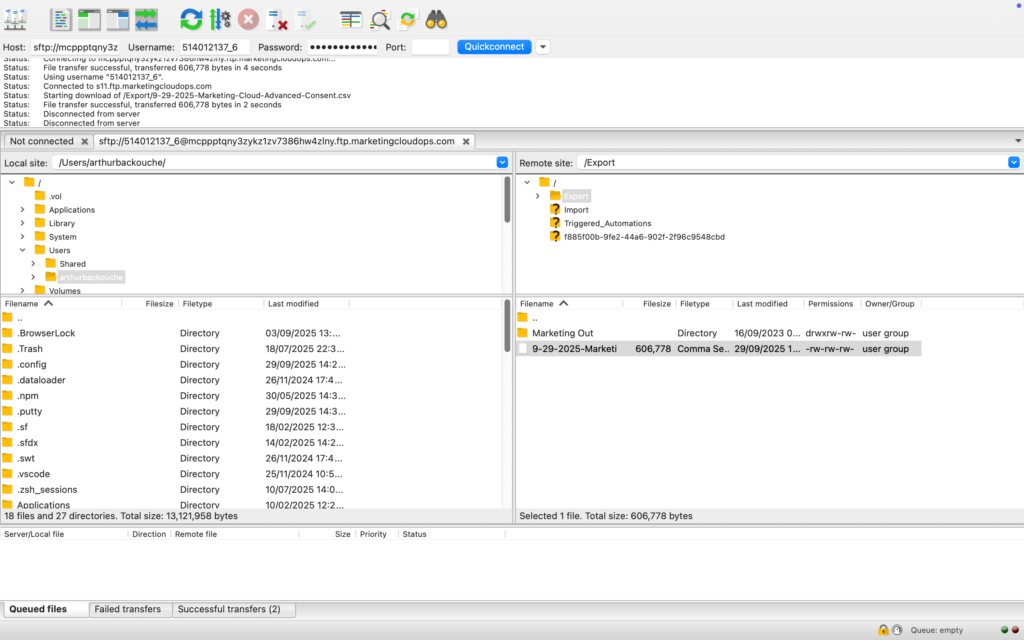
Step 3: Export via SFTP #
Export the Data Extension to a CSV file using the Marketing Cloud SFTP functionality:
- Connect to the Marketing Cloud SFTP server using an FTP client (such as FileZilla)
- Locate and download the generated Data Extension CSV file
- Save the file to your local system
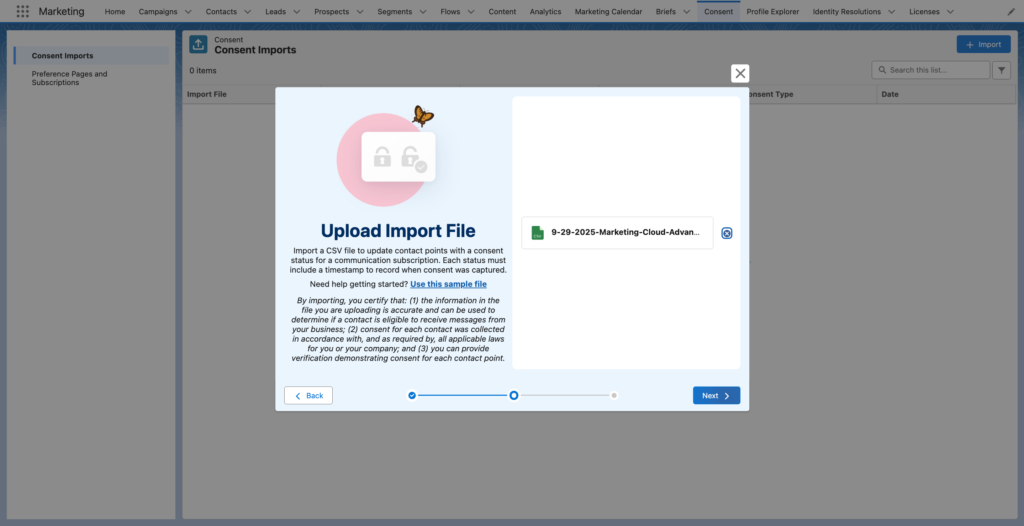
Step 4: Import to Marketing Cloud Growth #
Complete the consent migration by importing the CSV file into Marketing Cloud Growth:
- Access the Consent system in Marketing Cloud Growth
- Upload the CSV file containing email addresses
- Process the import to opt-in the individuals listed in the file
This process ensures all active subscribers from Marketing Cloud Engagement are properly consented in Marketing Cloud Growth.