What is an Authenticated Domain in Marketing Cloud Next? #
An authenticated Domain in Marketing Cloud Next allows you to send email campaigns with your brand name/domain as sender. i.e. When you receive an email to promote the last iPhone from Apple, the domain of the email you receive is either apple.com or e.apple.com – This is an Authenticated domain that is used for email purposes. An Authenticated domain allows your customer to recognise and trust your brand when they receive an email but also the email service provide such as Gmail or Outlook to know that your brand is legit and that your email should rather land into the General inbox rather than the SPAM folder.
Why Marketing Cloud Next is using Sub Domain? #
Marketing Cloud Next is using a subdomain for the authenticated domain meaning that if you were Apple, you will be sending your email campaigns from the domain ‘e.apple.com’ i.e [email protected]. Using subdomain is interesting as Email Services such as Gmail, Outlook etc. will decide if you email campaign is landing within the General or SPAM folder of your customer based on the reputation of your domain. Using a subdomain dedicated for email campaigns is interesting because other factors such as web traffic won’t impact negatively the reputation of it.
Setting up the Authenticated Domain #
We will now navigate throughout the process of setting up the authenticated domain in Marketing Cloud Next.
Configuring the Authenticated Domain in Salesforce #
Navigate into Salesforce set-up and click ‘Set-up Email’.
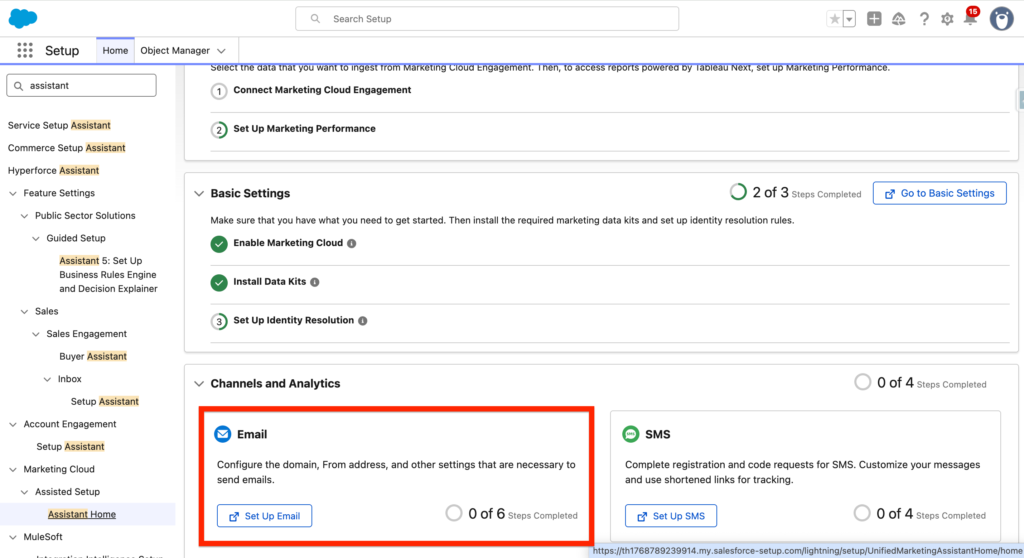
Within the Email page click on ‘Go to Authenticated Domains’ within the required section.

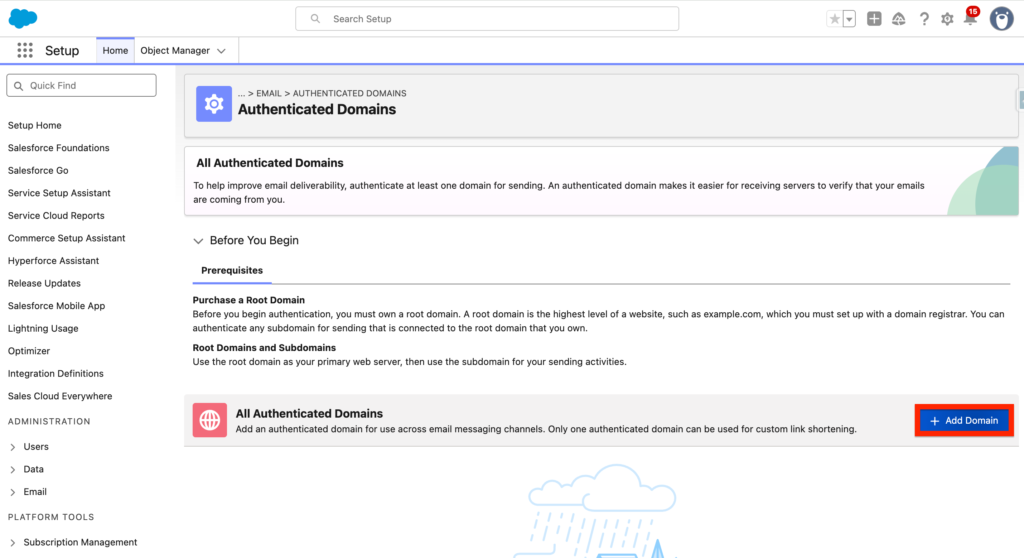
On the Authenticated page click ‘+ Add a Domain’
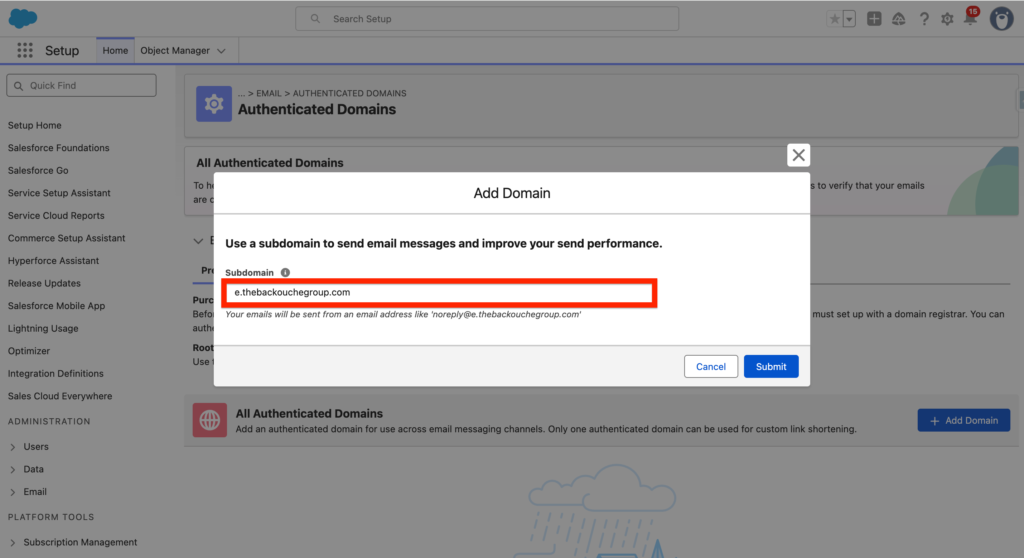
Now you have the possibility to add a subdomain. It will often be the name of your organisation with the ‘e’ or ‘email’ subdomain in front of it. For example I’ve added ‘e.thebackouchegroup.com’ then Click ‘Submit’.
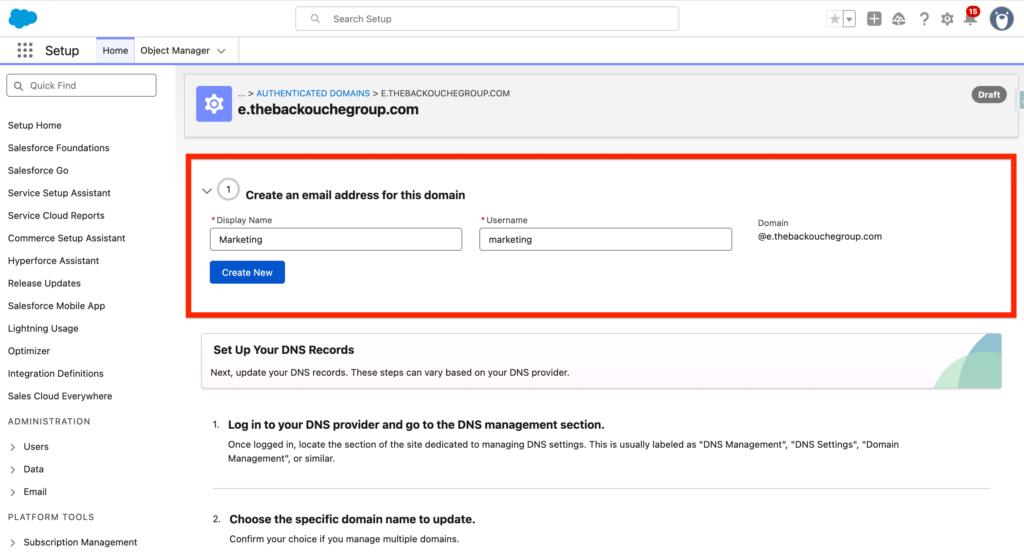
We now have the possibility to create an email address for this specific domain. In my case I’ve created [email protected] – as I want my newsletter from there. To confirm I’ve just clicked ‘Create Now’.
Updating the DNS Records from your Domain Registrar #
Now that I’ve configured the domain in Salesforce, the next step is to update the DNS records from your Domain Registrar (Where you bought your domain name) it will often be GoDaddy, Hostinger, Crazy Domains etc.. After sign-into my GoDaddy account, I will navigate to the DNS tab of my domain.

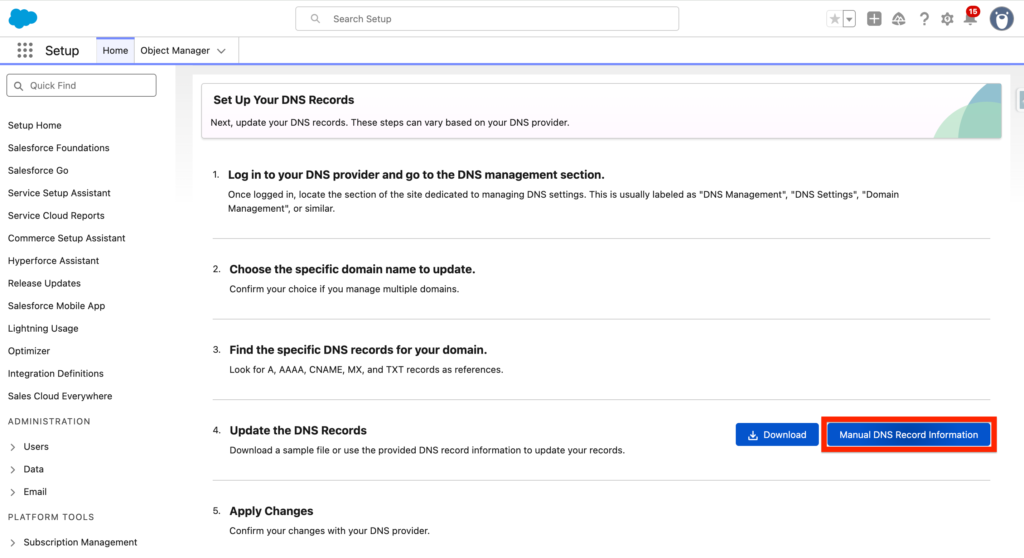
Back into Salesforce, I will click on the ‘Manual DNS Record Information’ within the section Update the DNS Records.
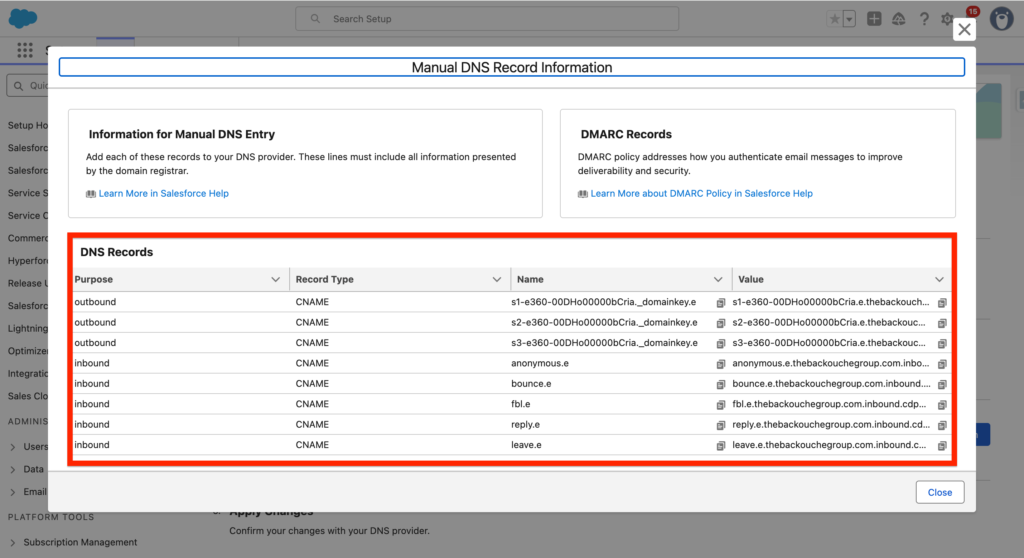
A list of DNS Records will be listed – I will add them directly into the DNS tab from GoDaddy and validate.
DNS Records listed in Salesforce to be added in GoDaddy:
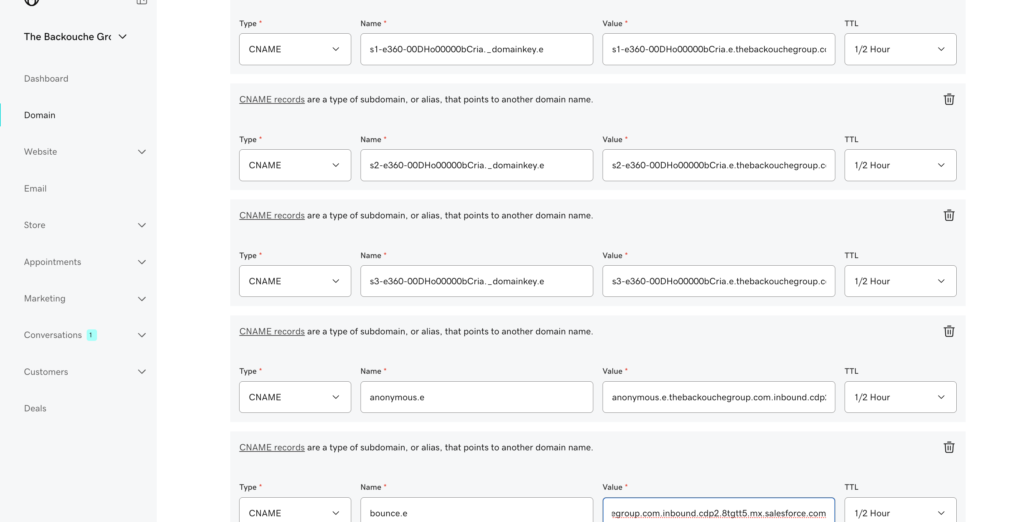
DNS Records added in GoDaddy:
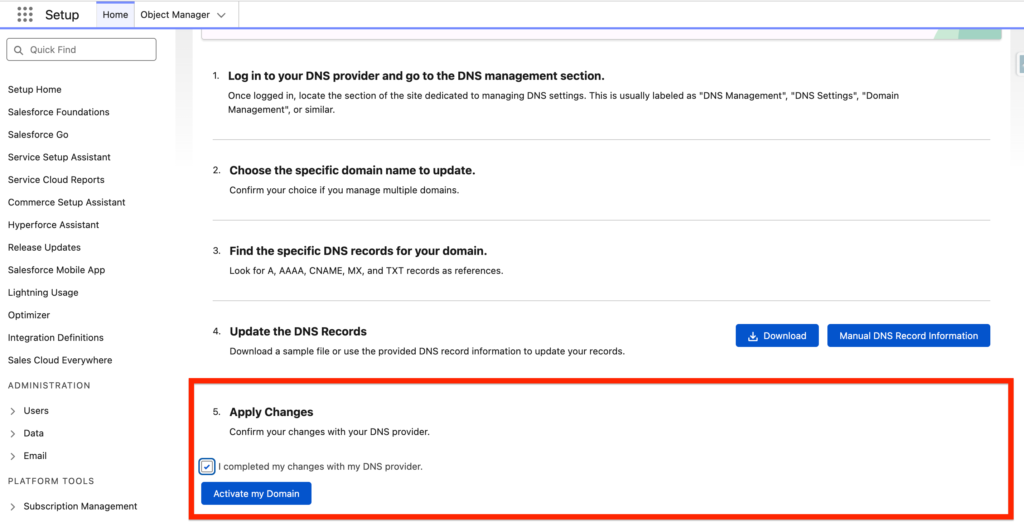
Finally I will click ‘Apply Change’ and it should validate my Authenticated Domain (Up to 72 hours).
Ressources:
https://help.salesforce.com/s/articleView?id=mktg.mktg_admin_domains_ref.htm&type=5
https://help.salesforce.com/s/articleView?id=mktg.configure_sap_and_private_domain.htm&type=5