
In this article we will learn how to enable tracking for an external website, so that we can measure how users are engaging with it – track user activities at a granular level, and create segments allowing us to deliver a personalised experience.
Enabling The Web Tracking Connector #
The objective will be to generate a snippet of code – our web tracking connector that will allow us to aggregate data on how website visitors are navigating on our website. We will be able to collect some type of events such as Page View, Link/Button Click, Form Submission and more.
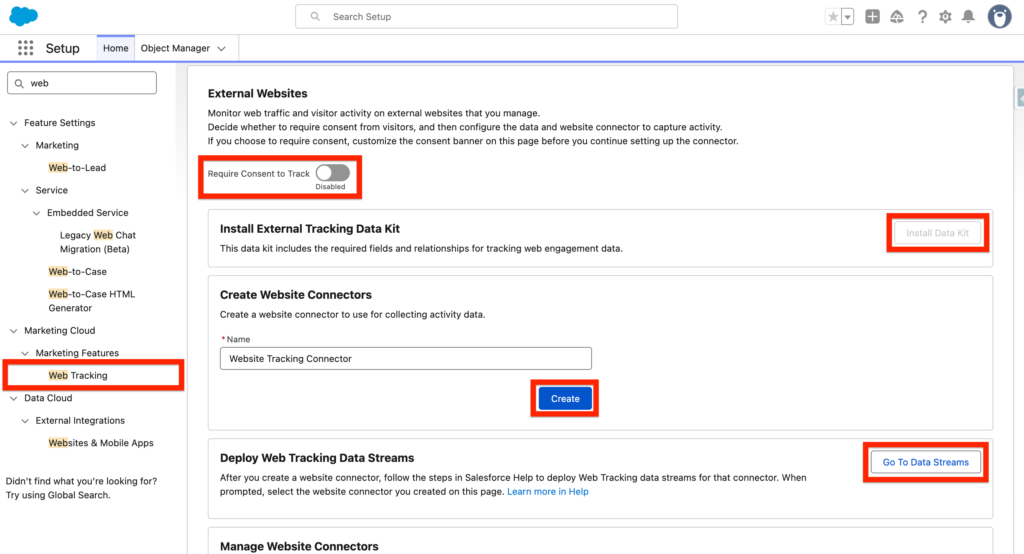
In Salesforce Set-up, navigate to Web Tracking and within the External Websites section ensure the Require Consent to Track is Disabled. Then Install the External Tracking Data Kit – This will enable the Web Engagement Data Model Objects in Data 360. Next, create a Website Connector (Website Tracking Connector) and click on Go To Data Streams.
Create the Web Tracking Data Streams #
The Web Tracking Connector will be injected into our website and will send Data to Data 360 (Data Cloud). Data Streams will be used to conduct the Data from the Web Tracking Connector to the Data Model Objects (DMO). As those Data Model Objects are related to the Unified Individual DMO, you will be able to populate segments – allowing you to create audiences based on how your website visitors are interacting with your website.
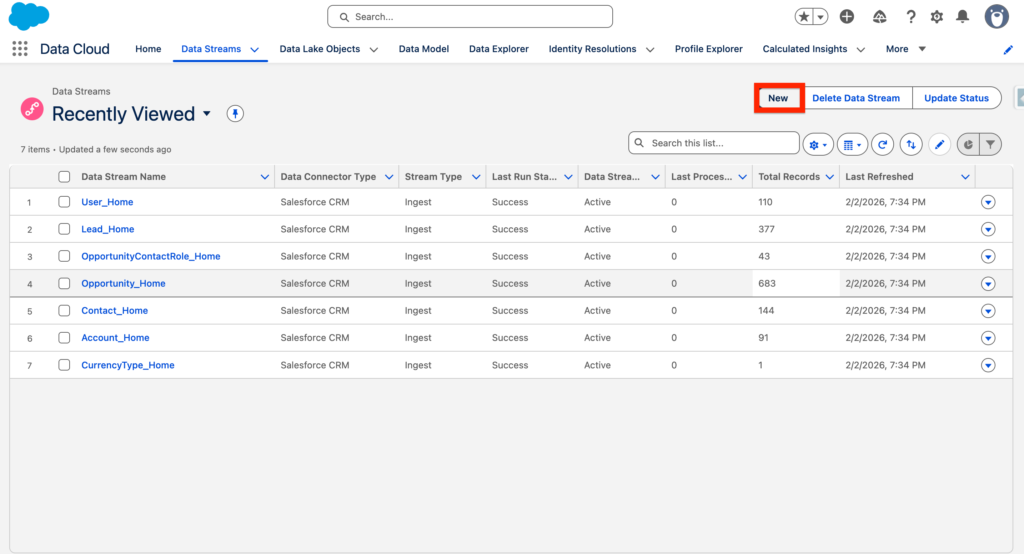
Navigate to the Data 360 App, within the Data Streams Tab click New.
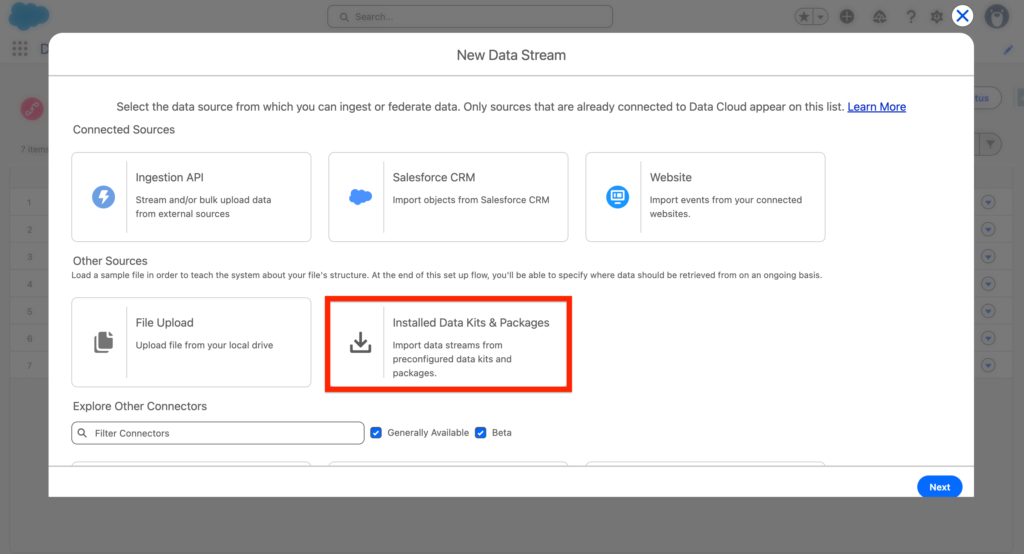
In new Data Streams, select Installed Data Kits & Packages, then click Next.
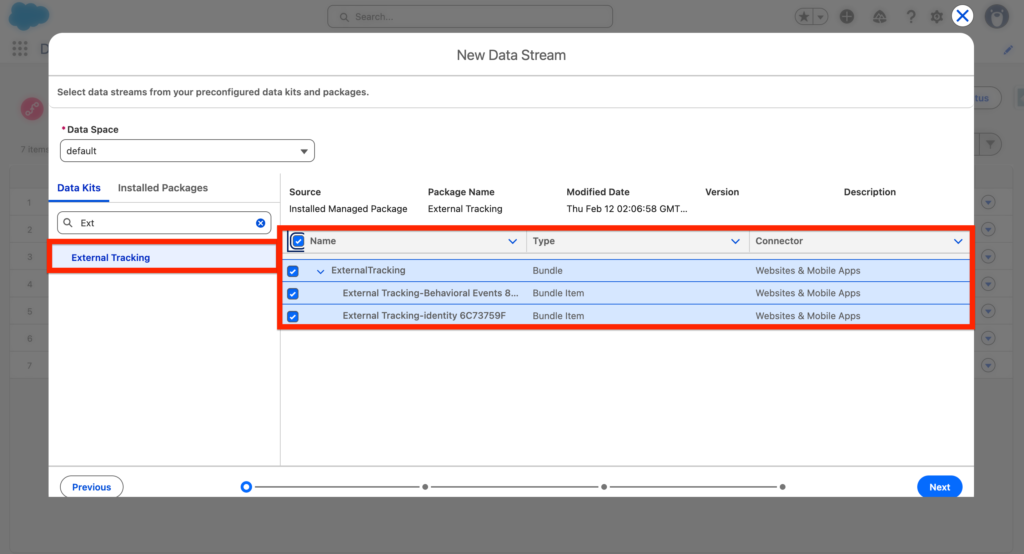
Next, search for External Tracking within the Data Kits tab and select all the Bundles and Bundle Items.
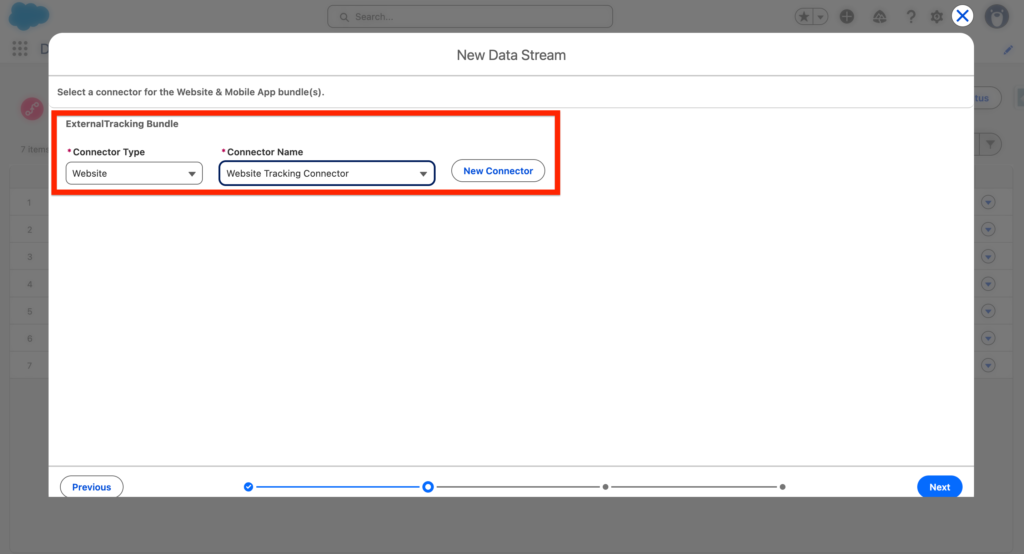
Within the External Tracking Bundle setting, select the Website Connector Type and the Connector we have created initially together (Website Tracking Connect), then click Next.
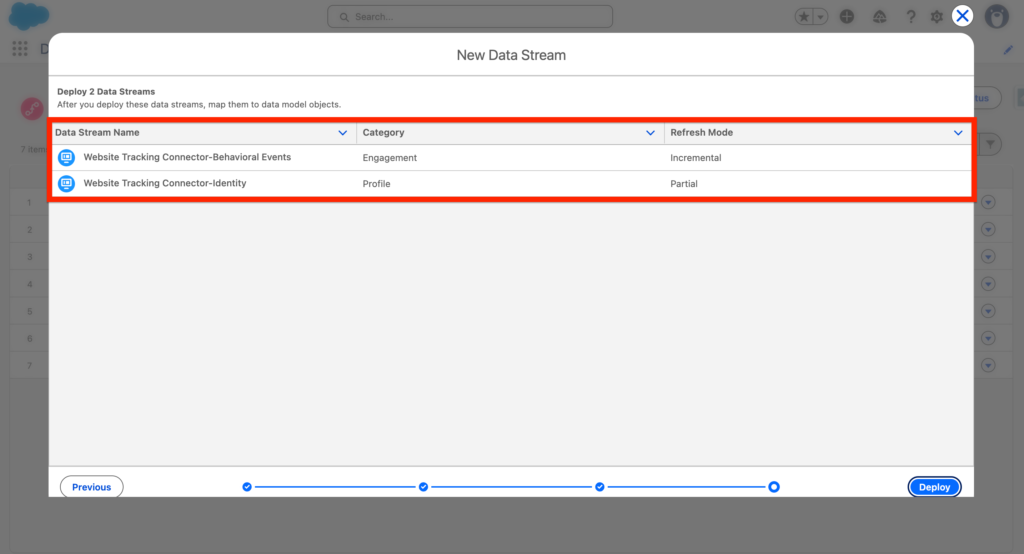
Finally Salesforce summarise the Data Streams that are about to be created:
- Website Tracking Connector-identity 4FA2B5CC
- Website Tracking Connector-Behavioral Events 4FA270A5
Create the MarketingStreamingAppConfig Data Stream #
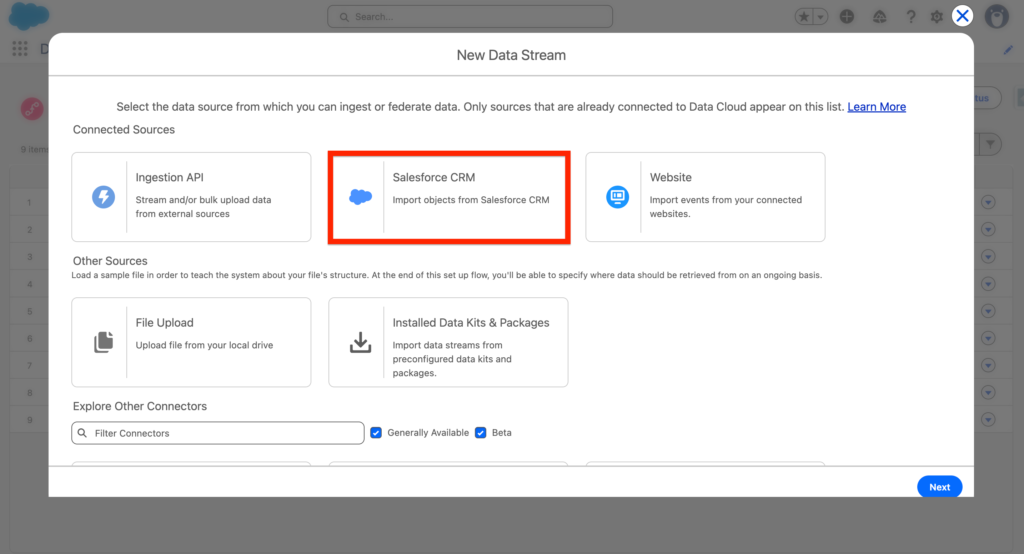
Create a New Data Stream, and select Salesforce CRM as Data Source. The MarketingStreamingAppConfing is a Data Stream that will allow you to pull the information collected from the Website Connector (Available within the 2 Data Streams above) into the Related Campaign that we will select in the Next Step.
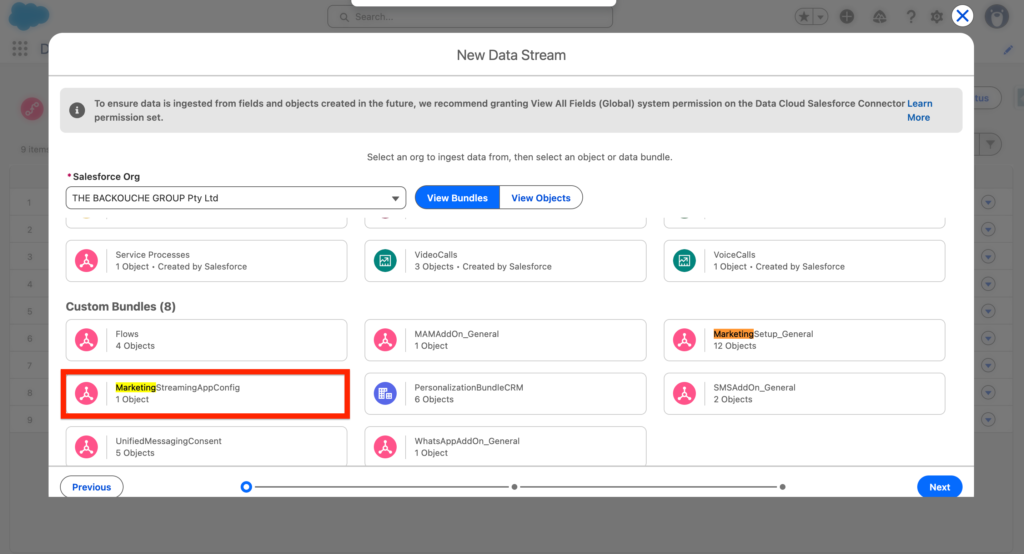
Then within the Bundles, search for the MarketingStreamingAppConfing.
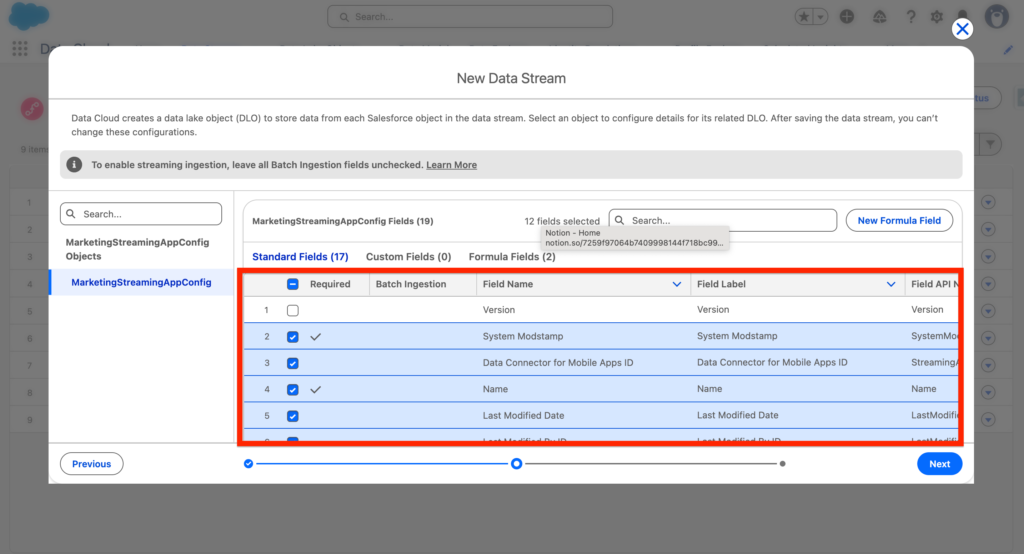
Review the attribute fields that will be part of the Data Stream.
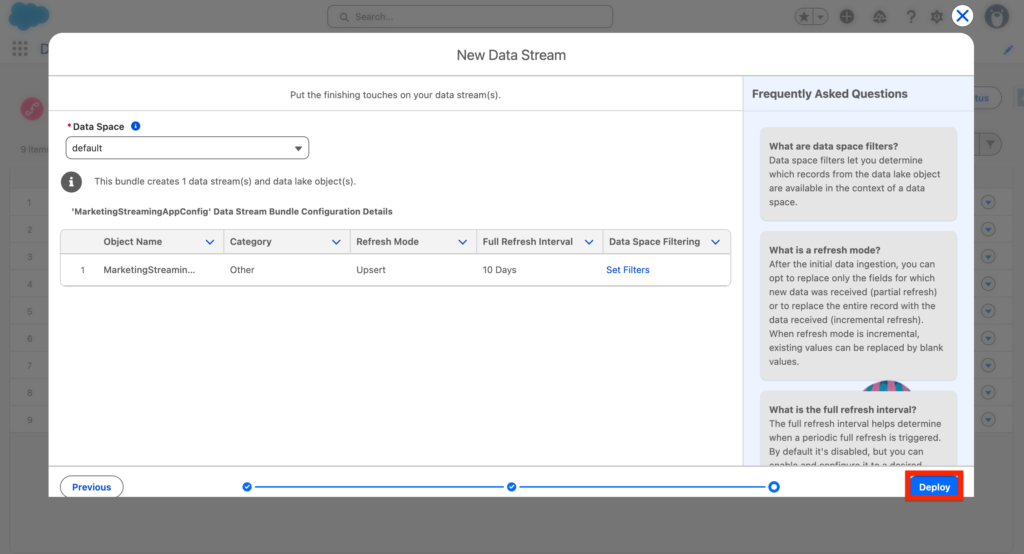
Review and click Deploy.
Access the Website Connector #
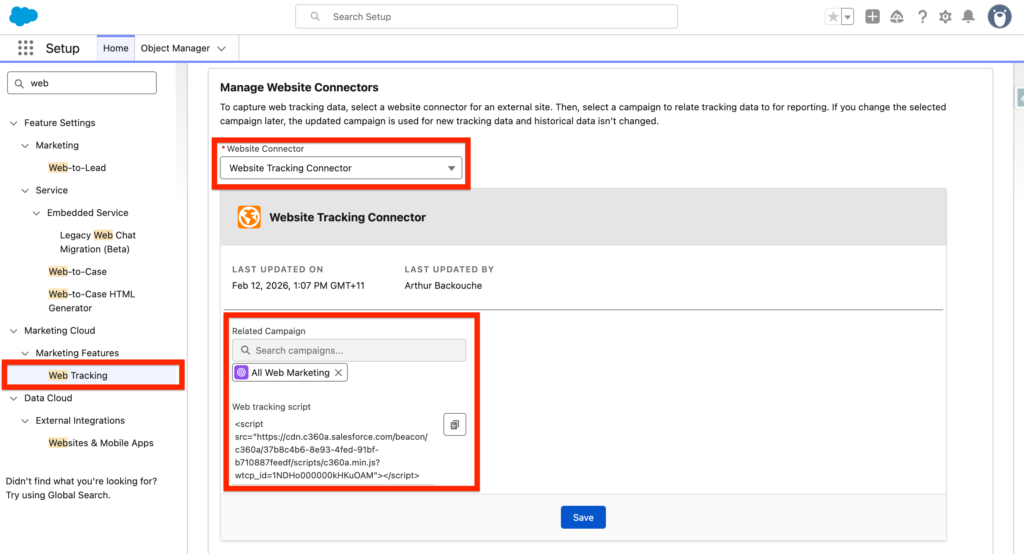
Now in Salesforce Set-up, Go back to Web Tracking and within the Manage Website Connectors section select your Website Connector (Website Tracking Connector), then select a Related Campaign and click Save.
You will have the possibility to add a related Campaign for the Website Connector. It can be useful for reporting purpose as you will be able to generate reports that help you to understand how people interacted with your website and/or webpages into a specific campaign. You can also update the campaigns and new result will be populated into the new campaign only (i.e Create a new Campaign for each Quarter Q1. Q.2 Q.3 Q.4).
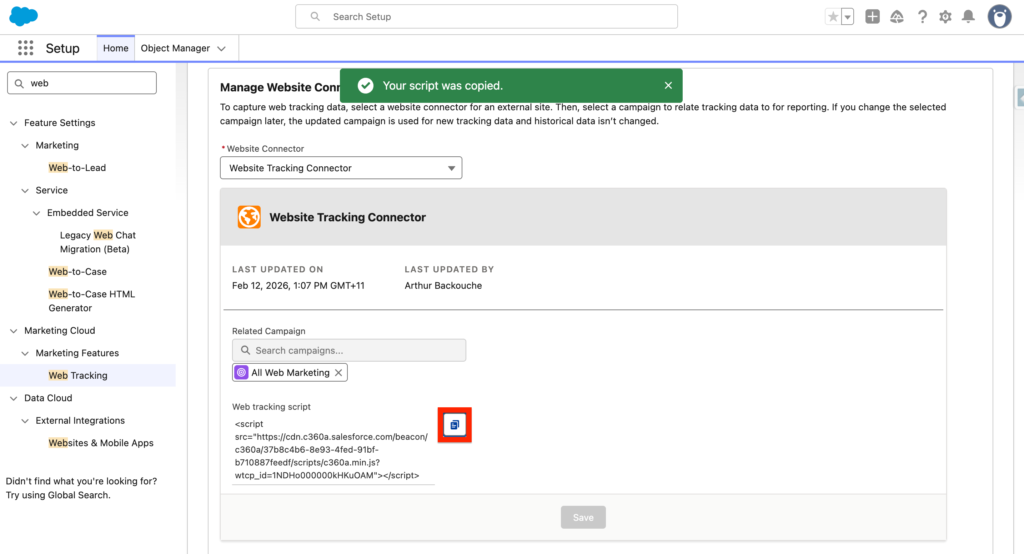
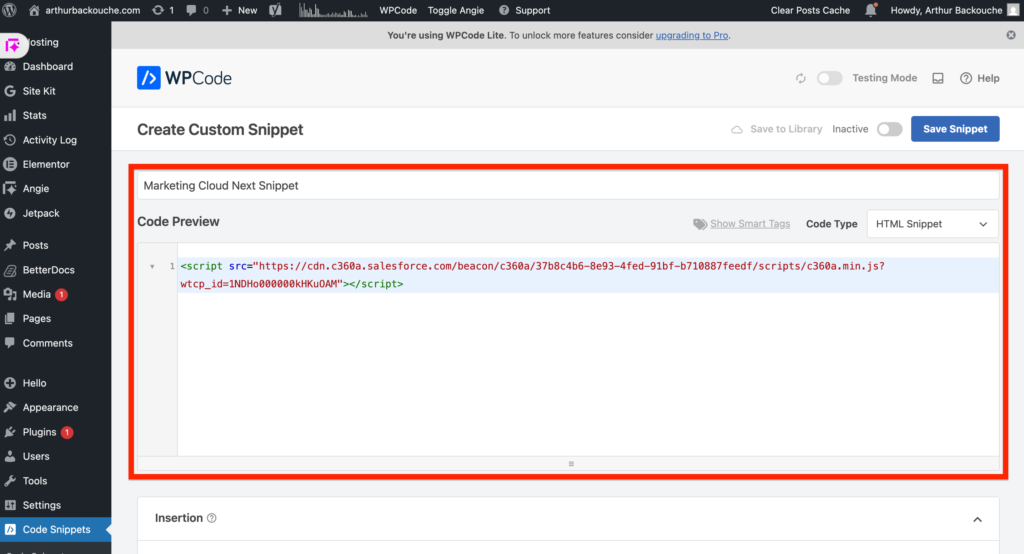
Copy the script generated.
Add the Website Connector into your Website #
You can now add it within your website headers. In my case, I will use it into my current website, and I will put as Site Wide Script (meaning the script is injected within all the pages of my website headers) – Publish and Activate the script.
Ressources: https://help.salesforce.com/s/articleView?id=mktg.mktg_consent_tracking_parent.htm&type=5