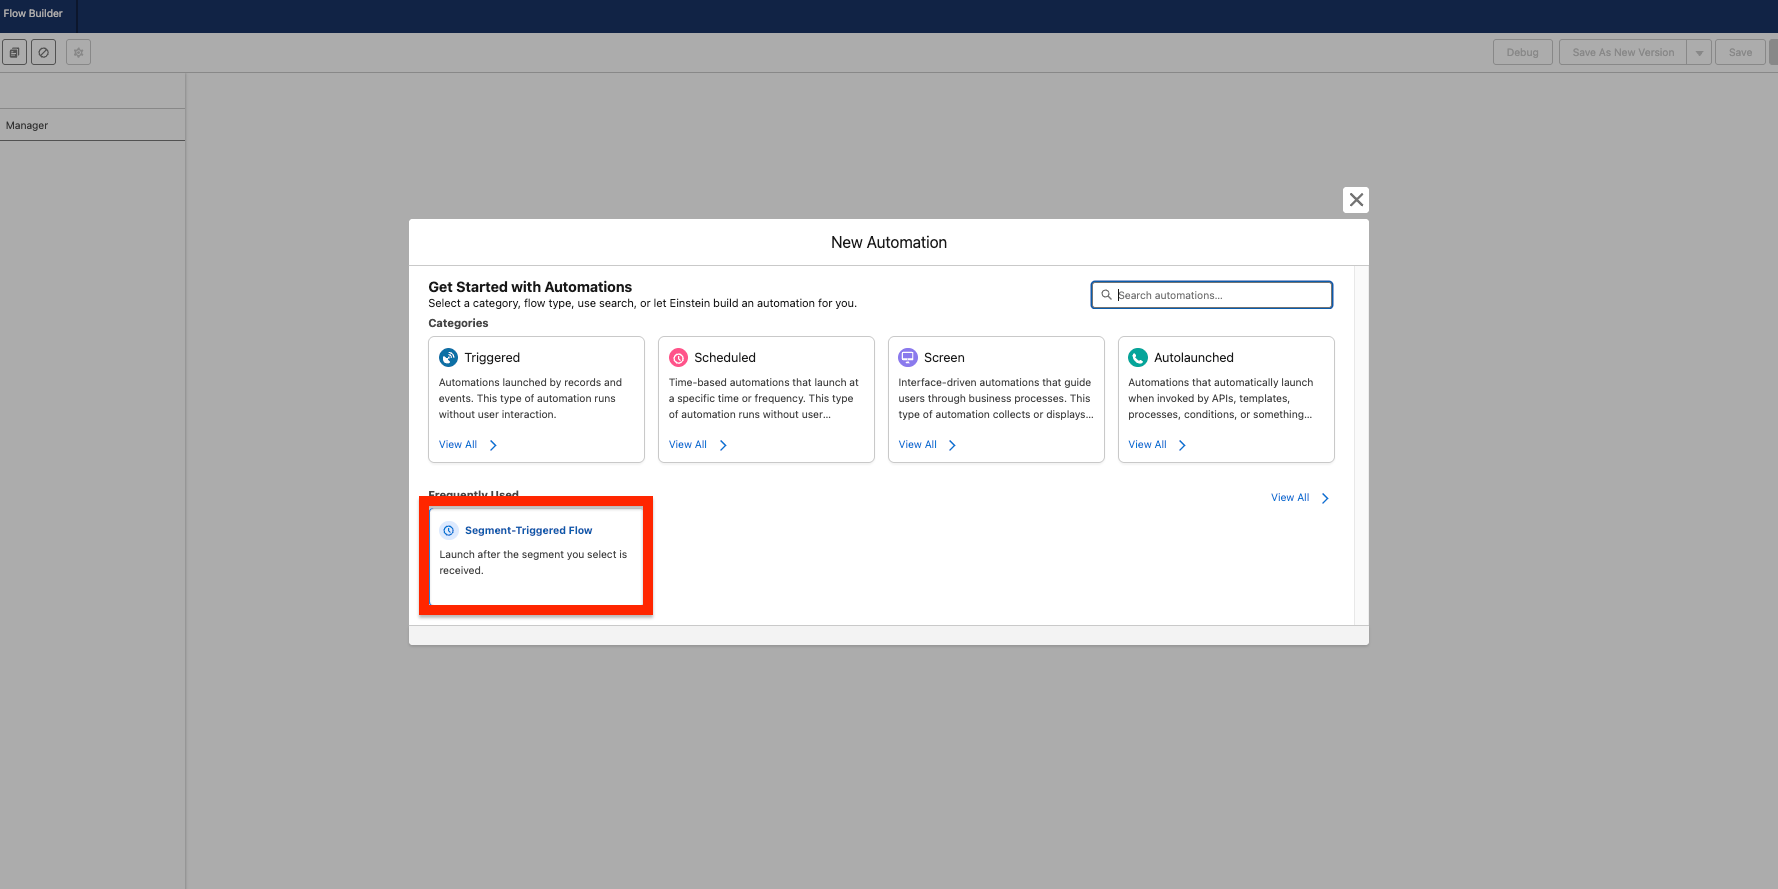
Step 1: Create a Segment Triggered Flow #
When creating your flow, choose Segment Triggered Flow as your flow type. This streamlined option allows you to simply select your target audience segment, and they’ll automatically receive your marketing communications through the flow.
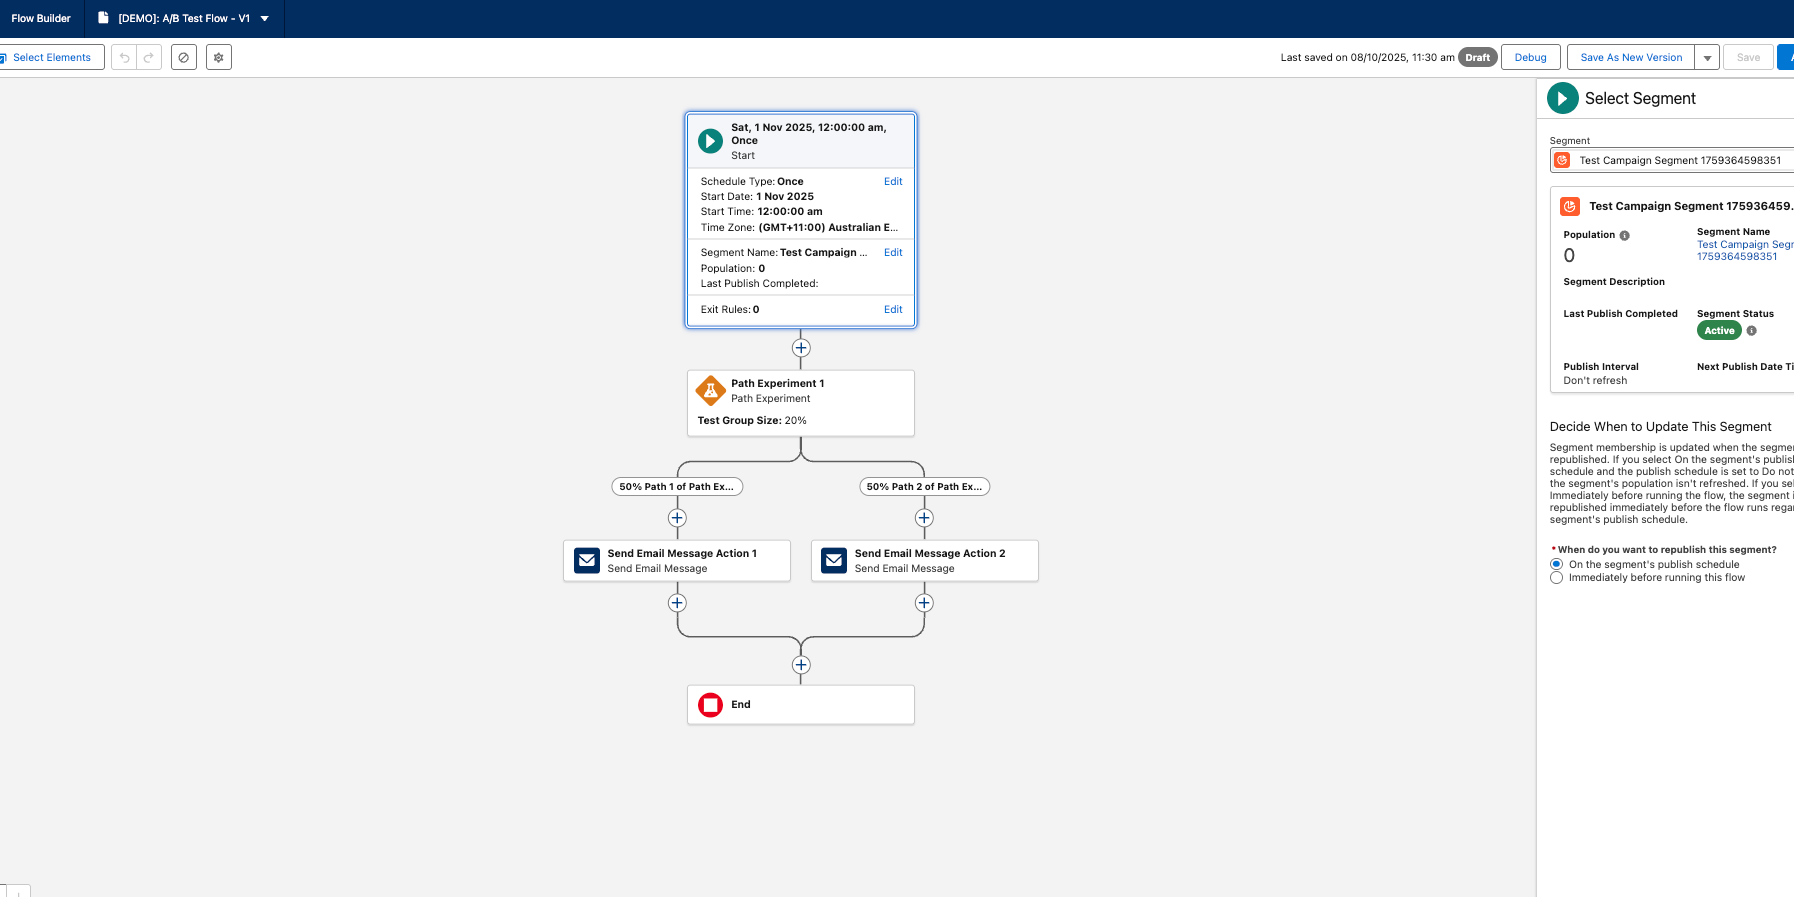
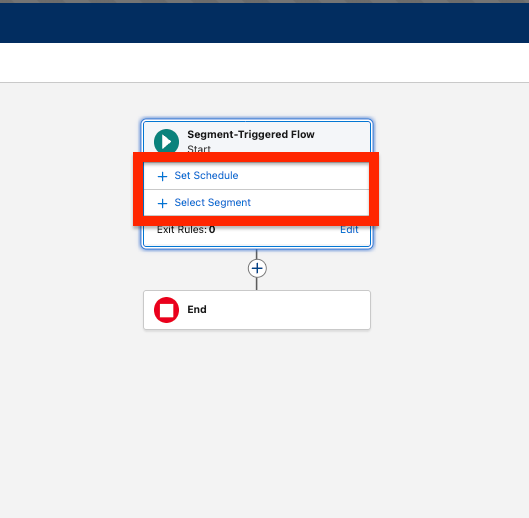
Step 2: Configure Your Segment and Schedule #
In the Segment Triggered section, you’ll define two key elements:
- When: Set your desired schedule for when the flow should run
- Who: Select the segment that will receive your emails
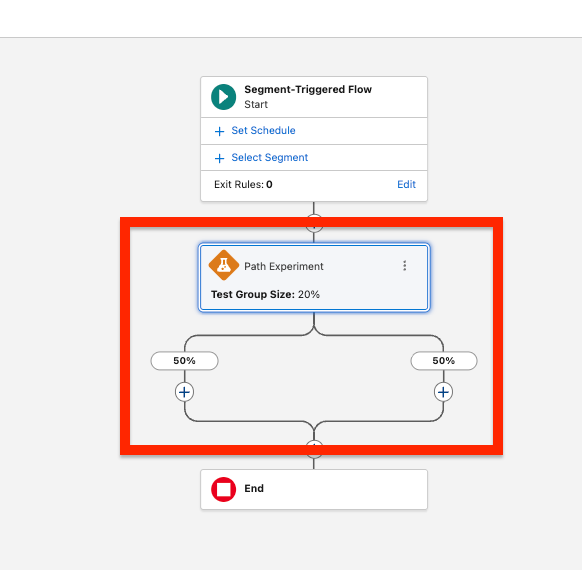
Step 3: Add A/B Testing #
Drag and drop the Path Experiment Component onto your flow canvas. This will automatically split your flow into two parallel paths (Path A and Path B), enabling you to test different email variations.
Step 4: Configure Your Email Variants #
For each path in your experiment:
- Drag the Email Templates Element into the path
- Select the appropriate email template for that variant
- Important: Remember to specify the sender for each email message