A key feature of Marketing Cloud Next is to send emails. In this article we will learn how it is possible to send email with Marketing Cloud Next.
Create a Campaign #
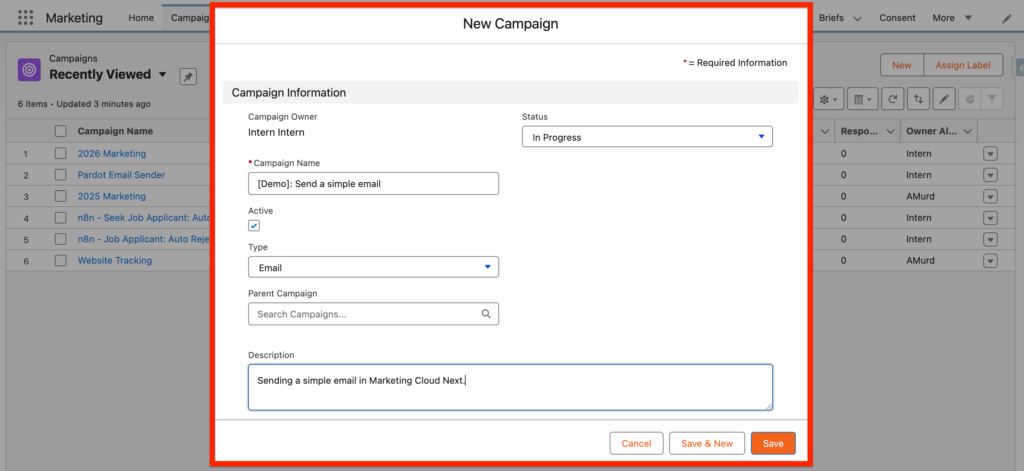
After accessing the Marketing App, and click on the ‘Campaigns’ tab, click ‘New’ and you will be able to create a new Campaign.

A new pop-up window will open and you will need to fill-out basic information such as Campaign Name, Status and Description.
Create a Brief #
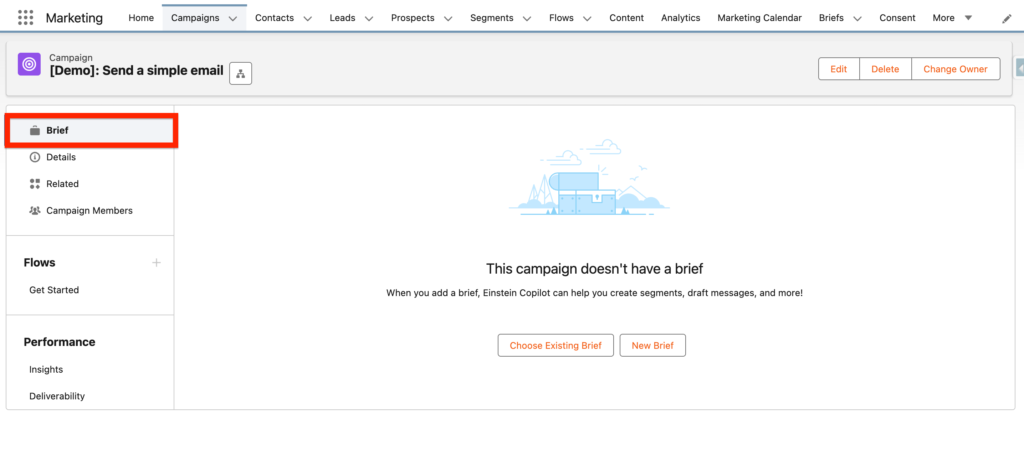
A Brief in Marketing Cloud Next allows you to determine the purpose and objective of your Marketing Campaign – What is the end goal of your Marketing efforts. Interestingly it allow help Einstein to generate engaging content for your campaign.
Within the Brief tab, you will have 2 options, either choose an existing brief or create a new one:
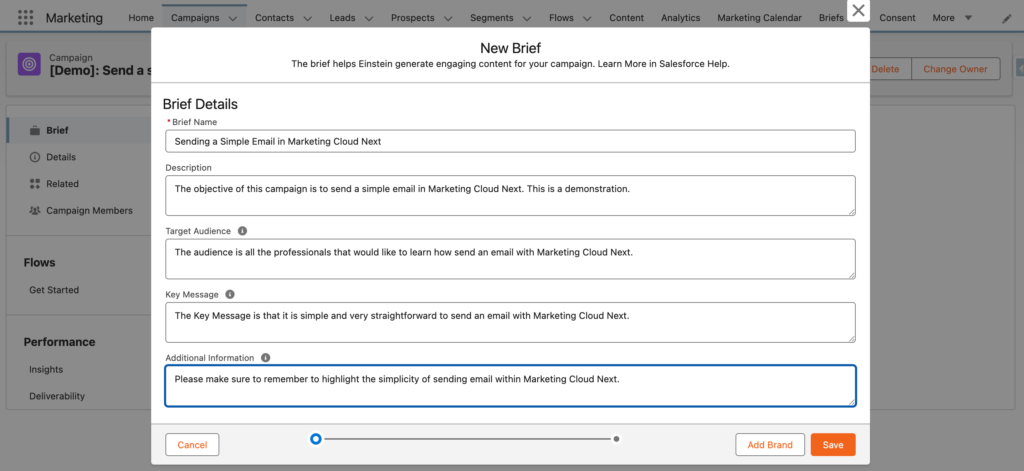
Within the Brief Campaign pop-up window you will need to define the following information:
- Brief Name: Sending a Simple Email in Marketing Cloud Next
- Description: The objective of this campaign is to send a simple email in Marketing Cloud Next. This is a demonstration.
- Target Audience: The audience is all the professionals that would like to learn how send an email with Marketing Cloud Next.
- Key Message: The Key Message is that it is simple and very straightforward to send an email with Marketing Cloud Next.
- Additional Information: Please make sure to remember to highlight the simplicity of sending email within Marketing Cloud Next.
Campaign Detail page #
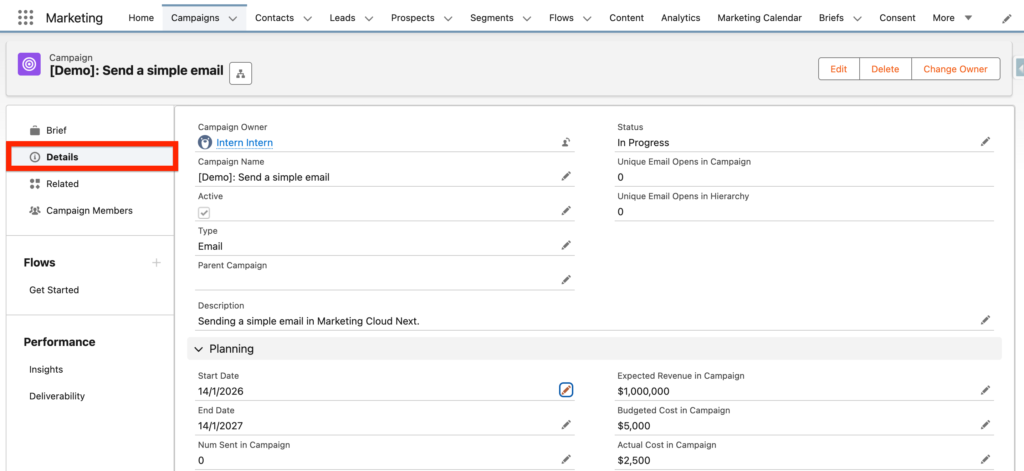
The details page of the campaign will allow you to enter Planning information such as:
- Start Date
- End Date
- Num Sent in Campaign
- Expected Response (%)
- Expected Revenue in Campaign
- Budgeted Cost in Campaign
- Actual Cost in Campaign
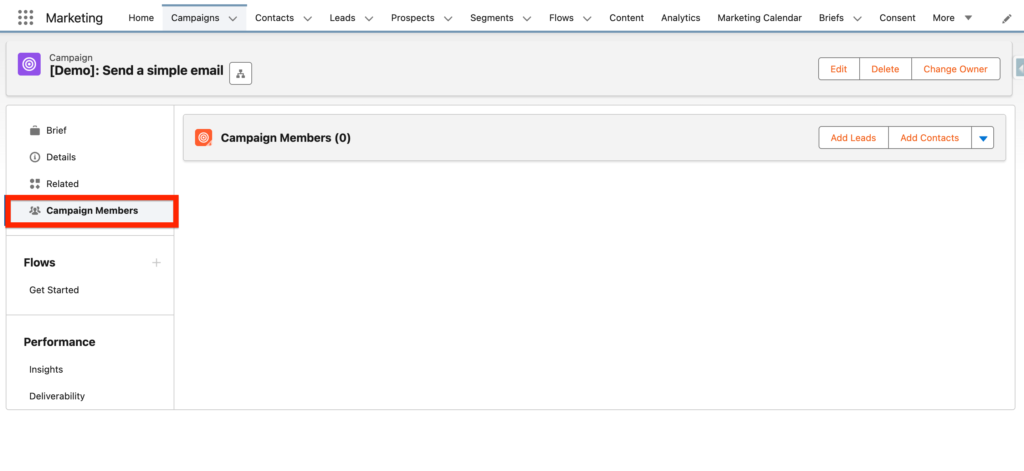
Campaign Members #
In the Campaign Member tab you you will be able to add some Leads and Contacts directly by click on the buttons in the top right. You will also be able to visualise who is part of the campaign.
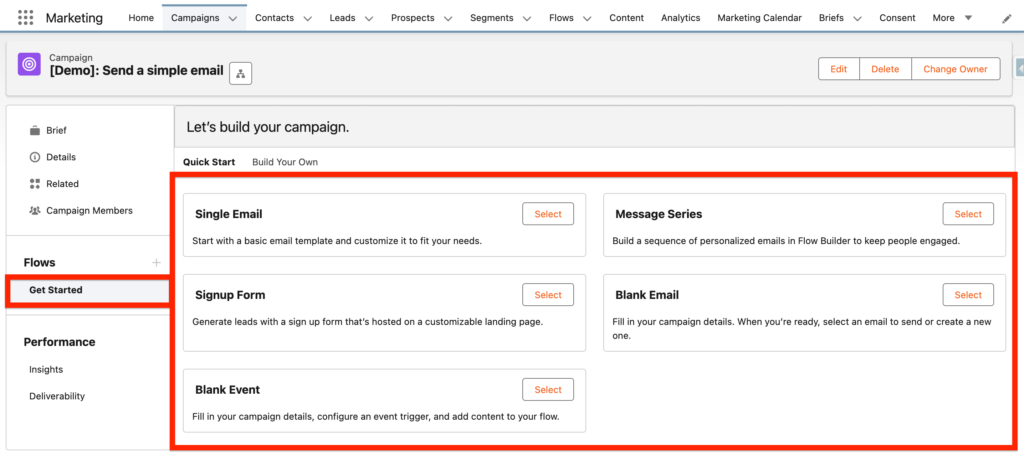
Create a Flow #
When creating a new Flow within the Campaign record of Marketing Cloud Next you will have the possibility to select a range of different actions such as:
- Single Email: Start with a basic email template and customise it to fit your needs.
- Signup Form: Generate leads with a sign up form that’s hosted on a customisable landing page.
- Blank Event: Fill in your campaign details, configure an event trigger, and add content to your flow.
- Message Series: Build a sequence of personalised emails in Flow Builder to keep people engaged.
- Blank Email: Fill in your campaign details. When you’re ready, select an email to send or create a new one.
In our case we are selecting ‘Single Email’.
Single Email Flow #
The Single Email Flow includes a few elements that needs to be configured in order to activate the campaign and send the email.
Schedule: Schedule when an audience can enter the flow. The schedule doesn’t start until you activate the flow.
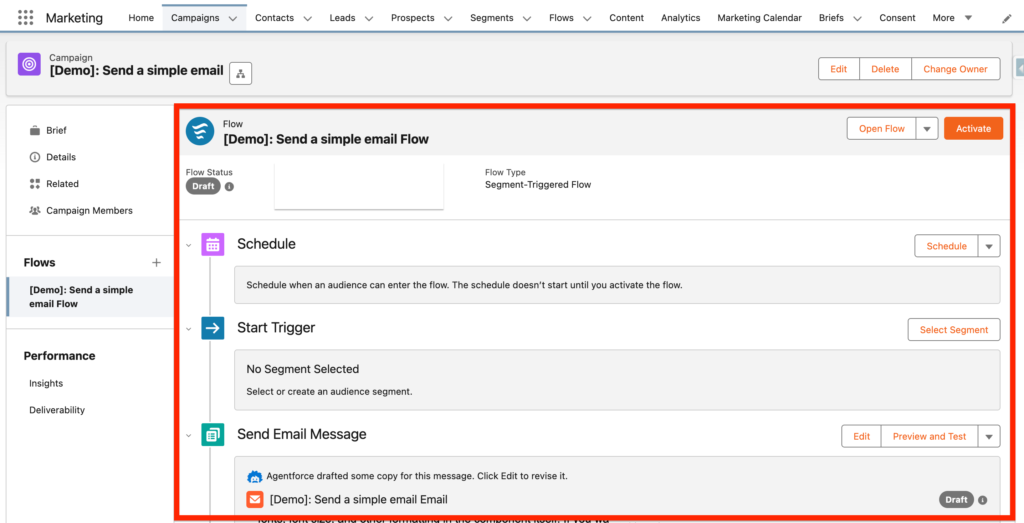
In our case we will schedule the email to be sent at the end of month at 9am.

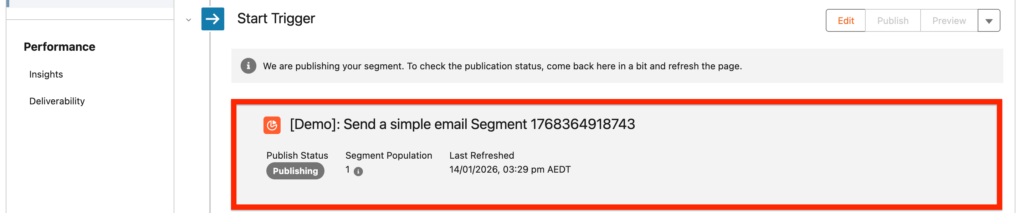
Segment: Select or create an audience segment.
A range of options are available to determine the recipients of your email. We will select the Campaign Members option as it is the easiest one. However other options are available including:
- Use Quick Filters: To create a segment quickly, apply common filters for targeting your audience.
- Send to Campaign Members: Create a segment based on campaign membership.
- Go to Segment Builder: Create a segment manually in Segment Builder.
- Select an Existing Segment: Select a segment from an existing list of segments.
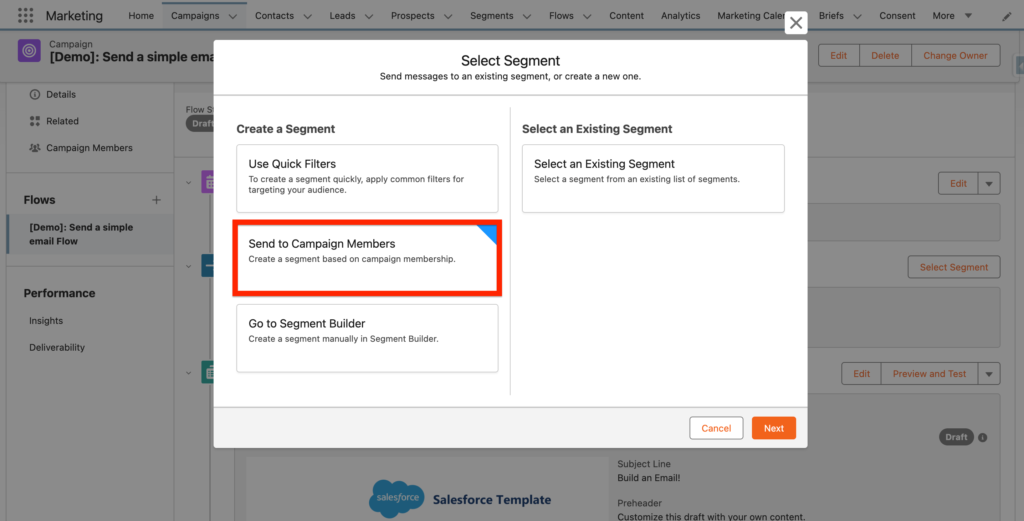
After selecting the Campaign Member segment we Publish it.
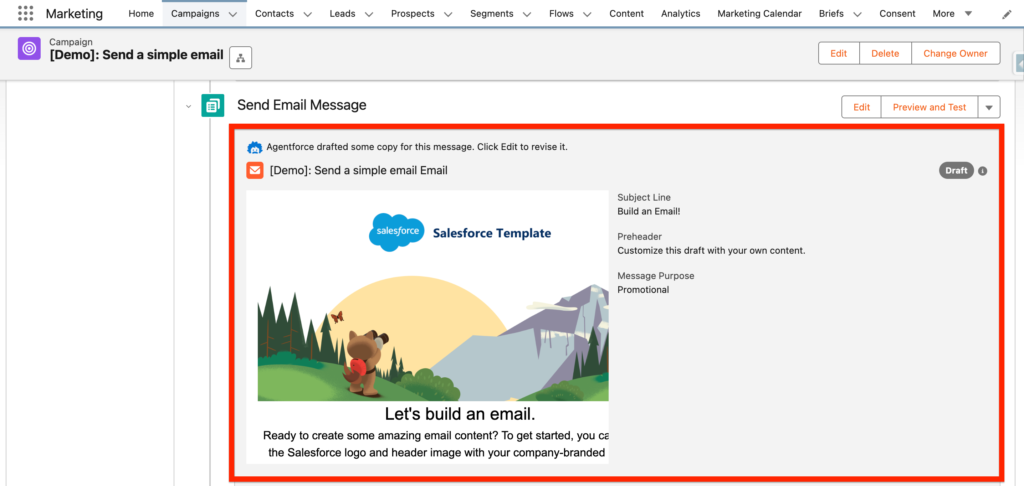
Select Email Message: Select or create an Email Message
Then in the Send Email Message section of the flow we will be selecting an Email Template. In our case we will pick the generic one provided with Marketing Cloud Next.
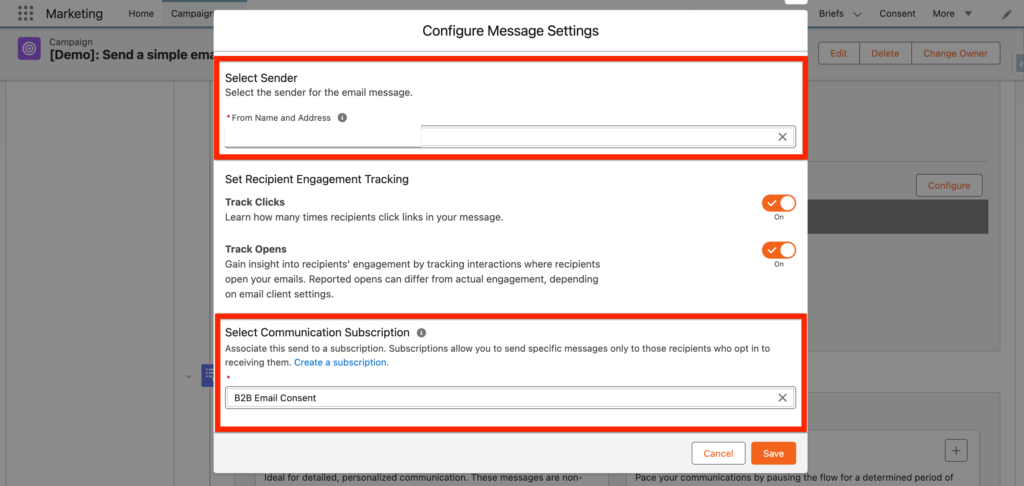
Configuration:
The very last step will be to click on Configuration. This will allow you to select the Sender for your email as well as the Communication Subscription channel.
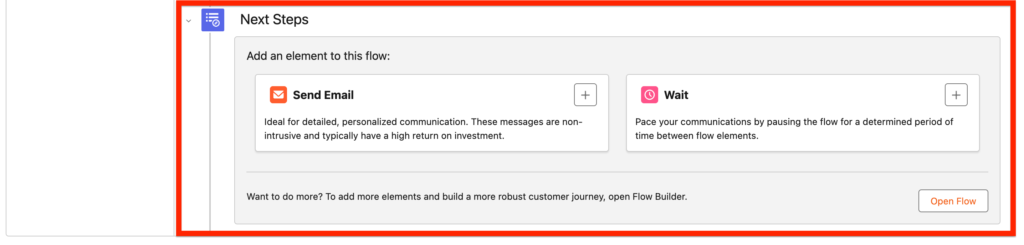
Next Steps (if needed):
The Next Steps section will determine if you want to do something after sending your initial email, it can be either sending a second Email and/or Waiting for a specific period of time. Those elements are optional.
Activate:
If you are happy with the configuration you can now activate the campaign:

Ressources:


