In Marketing Cloud Next, when new customers are being added to the Salesforce Platform (Contacts and Leads) – they will be automatically added as opted-out from email communications.

In a world where privacy is becoming more and more important I understand that Salesforce added this functionality. However, after implementing multiple Marketing Cloud Next solutions for small and medium businesses (SMBs), I came to the following conclusion: SMBs just want their customers to be opt-in automatically. When someone is added to the CRM, they must be opt-in in Marketing Cloud Next, so that they can be emailed and potentially generate revenue.
The Automated Solution: Triggered Flow #
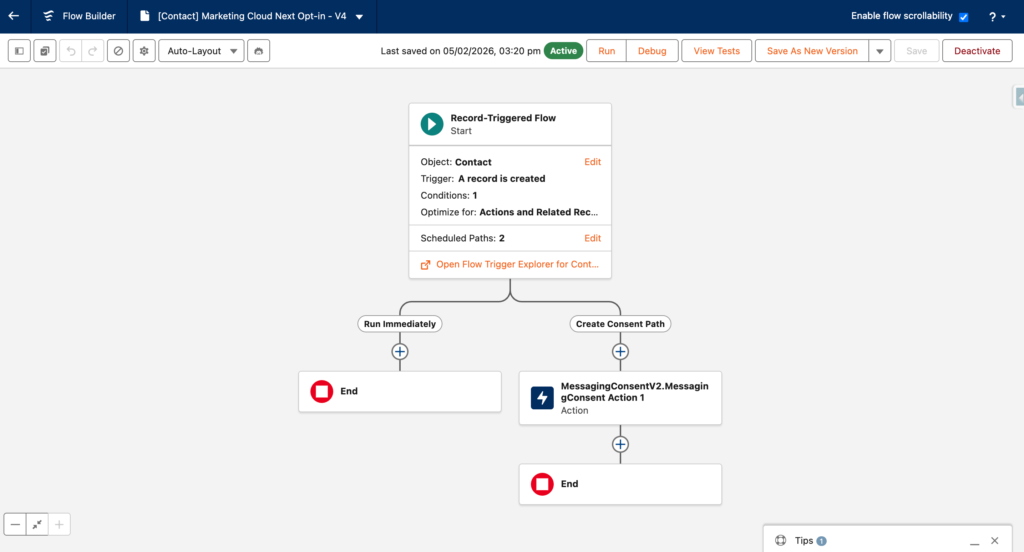
In this article I am explaining step-by-step how you can create a flow in order to opt-in Contacts when they are created in Salesforce CRM – The process needs to be replicated for Leads as well as Prospects if needed. The name of the Flow is: [Contact] Marketing Cloud Next Opt-in
Creating the Flow #
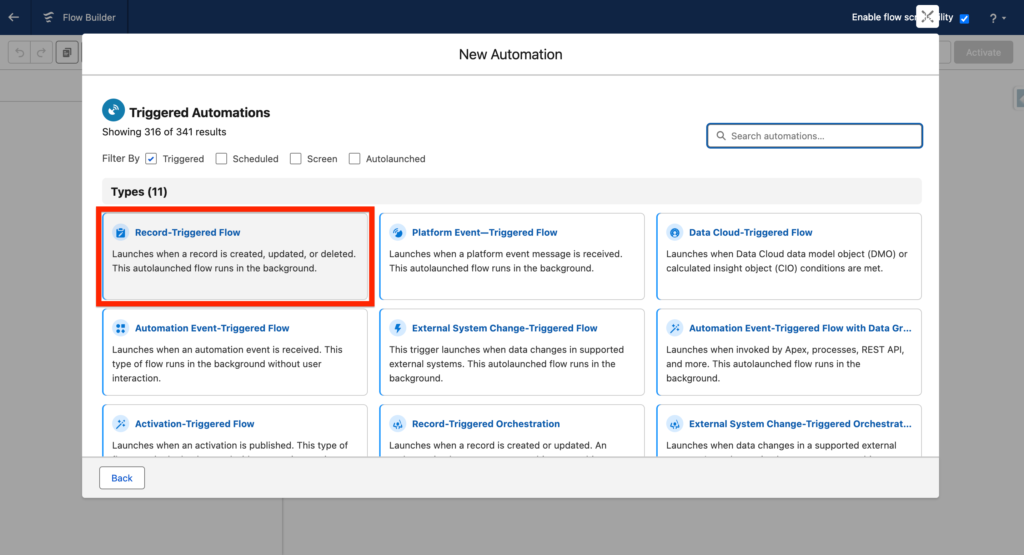
In Salesforce Set-up, Navigate to Flows and Create a New Record Triggered Flow.
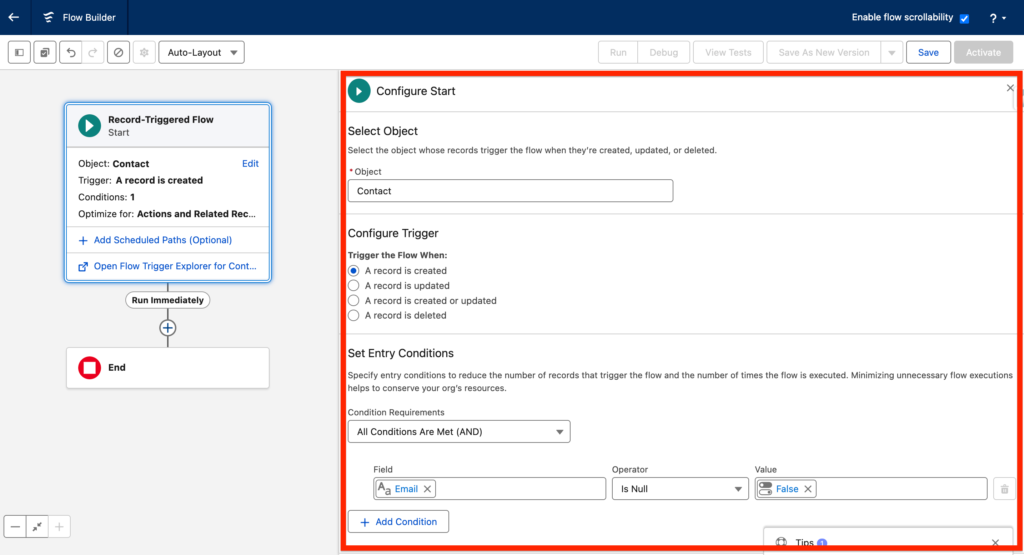
Configure Start Element #
- Object: Contact
- Trigger the Flow When: A record is created
- Condition Requirement: Email Is Null False
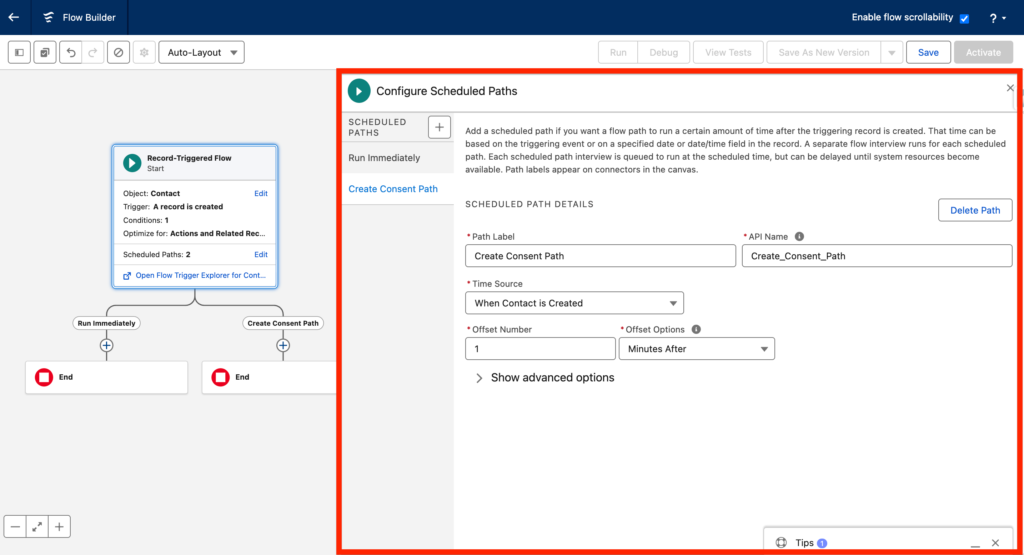
Create a Scheduled Path #
The Action Element that we will use in the next step can’t have nothing before it – Using a Scheduled Path is the way to avoid an error when trying to activate the Flow.
- Path Label: Create Consent Path
- Time Source: Contact is Created
- Offset Number: 1
- Offset Options: Minute After
Add an Action for Consent #
- Add an Action Element within the ‘Create Consent Path’
- Search for ‘MessagingConsentV2.MessagingConsent’
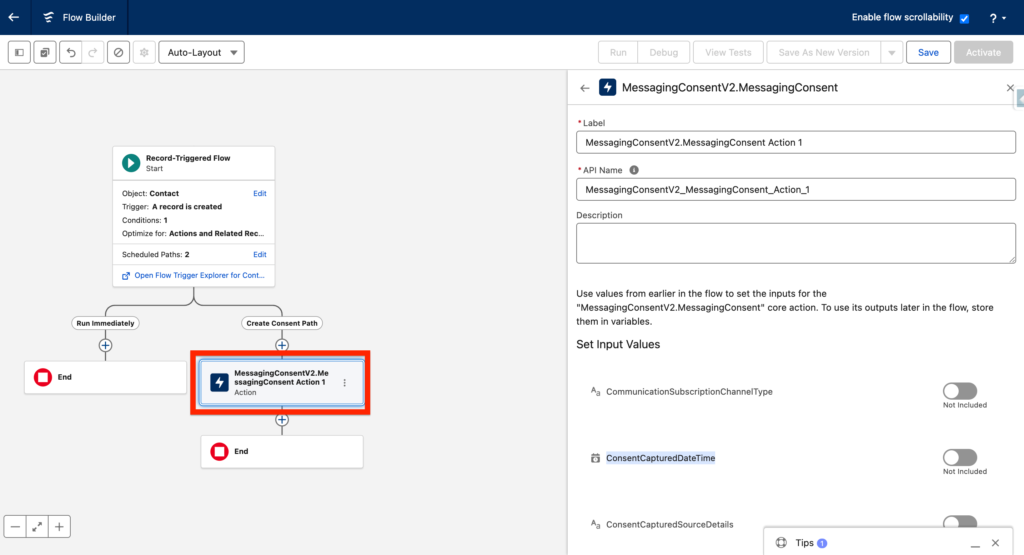
We now need to complete the field attributes required for the ‘MessagingConsentV2.MessagingConsent’ Actions:
- Name: MessagingConsentV2.MessagingConsent Action 1
- CommunicationSubscriptionChannelType: 0XlHo000000LYMVKA4 THE VALUE IS DIFFERENT IN YOUR ORG CHECK BELOW
- ConsentCapturedDateTime: {!$Flow.CurrentDateTime}
- ConsentCapturedSourceName: Record-Triggered Flow
- ConsentCapturedSourceType: Flow Action
- ConsentId: {!consentId} THIS IS A VARIABLE CHECK BELOW
- ConsentStatus: OPT_IN
- ContactPointValue: {!$Record.Email}
- UpdatedTime: {!$Flow.CurrentDateTime}
Finding the CommunicationSubscriptionChannelType Value #
The CommunicationSubscriptionChannelType value is unique to your org (always start with 0eB).
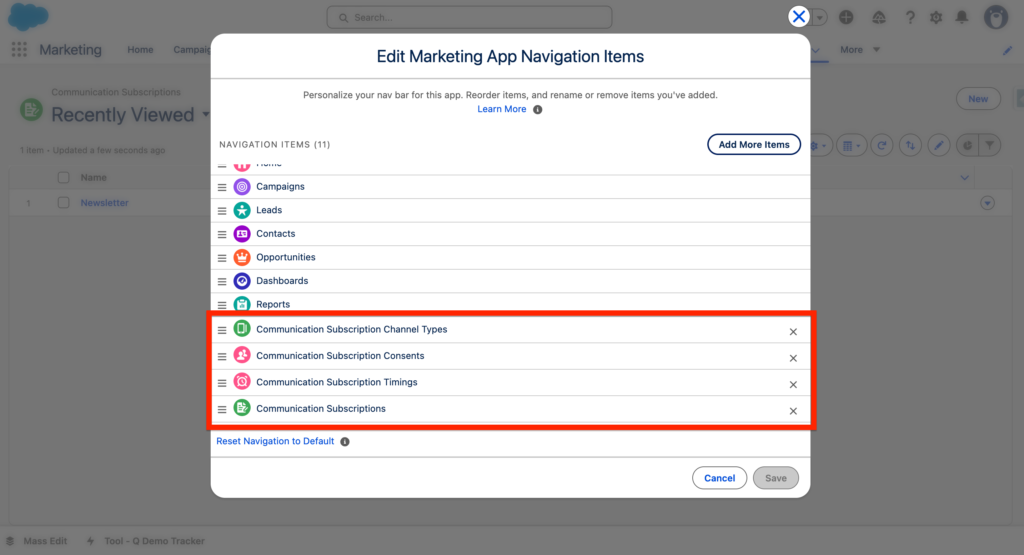
Navigate into the Marketing App (The Other one) – Click on the Pencil and Add the item: Communication Subscriptions
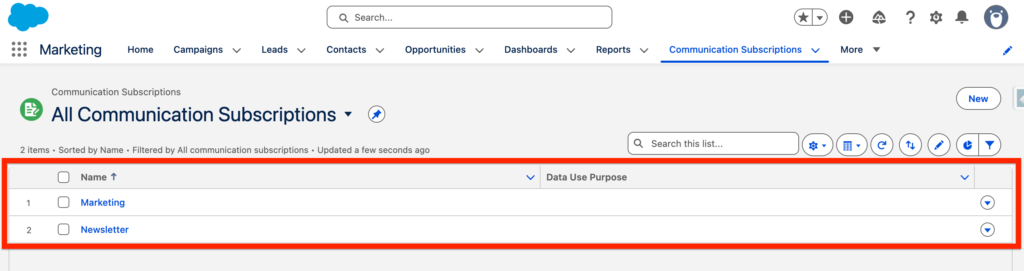
Within the Communication Subscriptions page click on the Subscription you have created. In my case I’ve 2 of them. The default one named ‘Marketing’ and a custom one named ‘Newsletter’. I will select Marketing.
After clicking on the Marketing Subscription I can see that the url is:
https://th1768789239914.lightning.force.com/lightning/r/CommSubscription/0XlHo000000LYMVKA4/view

Meaning the ID of my subscription is 0XlHo000000LYMVKA4
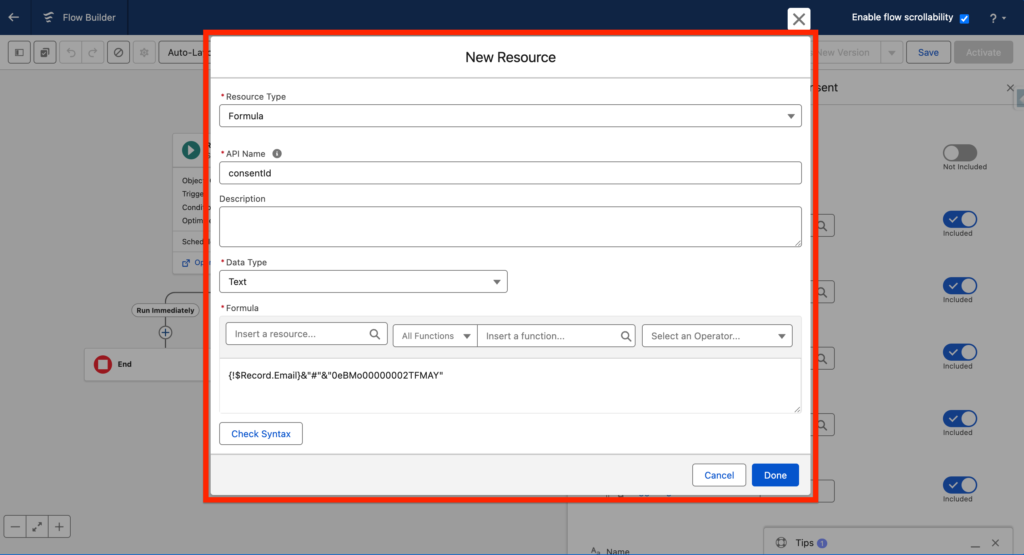
Creating the ConsentId Variable #
The ConsentId Variable is created the following way:
Click new ressource in the ConsentId field Attribute:
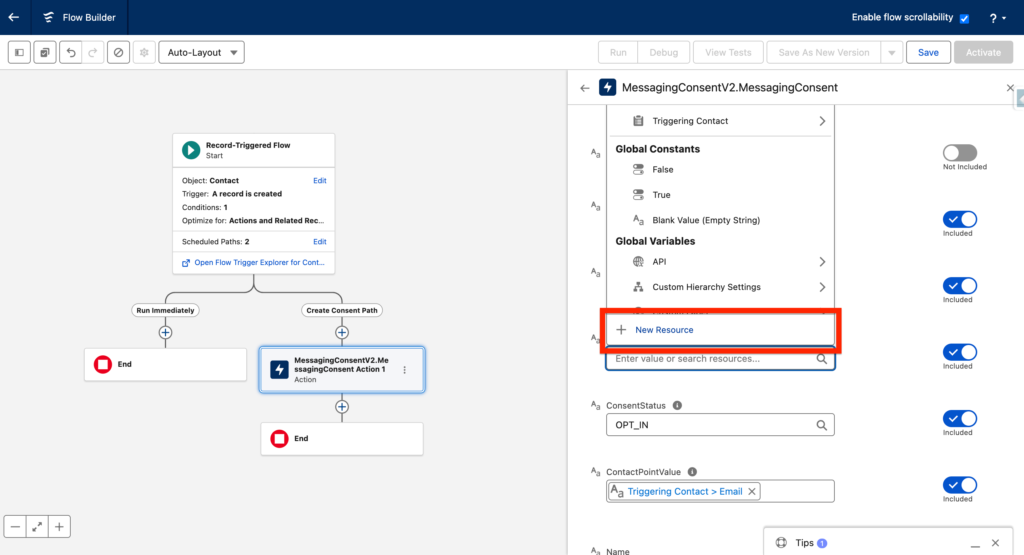
- Resource Type: Formula
- API Name: consentId
- Data Type: Text
- Formula: {!$Record.Email}&”#”&”0XlHo000000LYMVKA4” The ID is the Subscription ID that we found together in the last step.
Testing The Flow #
You can now activate the Flow – Create a Contact in Salesforce CRM – The Contact should be automatically opt-in for the Subscription that you specified.


