Basic Settings #
After enabling Data Cloud, navigate to ‘Assistant Home’ in Set-up, and you will see the ‘Basic Settings’ that includes 3 steps to kickstart the enablement of Marketing Cloud Next.
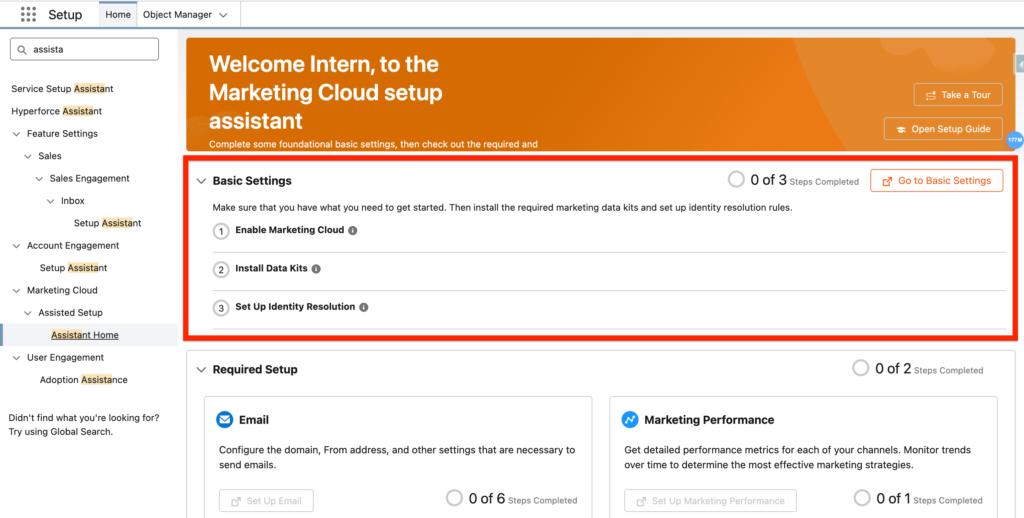
On the Basic Settings page, make sure to enable the followings items:
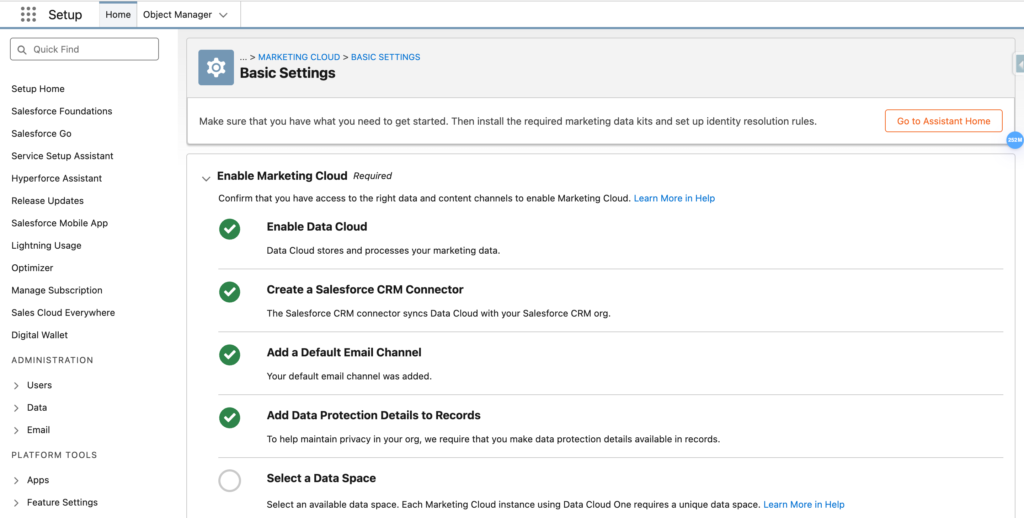
Enable Data Cloud #
The objective here is to confirm that you have access to the right data and content channels to enable Marketing Cloud. Link
- Create a Salesforce CRM Connector
- Add a Default Email Channel
- Add Data Protection Details to Records
- Select a Data Space
- Enable Marketing Cloud
⚠️ If the Select Data Space drop down bar is greyed out make sure you have the relevant Marketing Cloud Growth Permission set ‘Marketing Cloud Admin’.
This process is very straightforward, all you have to do is clicking on ‘Enable’.
Install the Marketing Kits #
Marketing Data Kits are objects, fields and relationships/connections that are installed on Data Cloud. These objects enabled the functionalities of the Marketing Cloud Growth Platform. Link
Here’s the list of the Data Kit Objects:
- Sales Data Kit
- Marketing Setup Objects Data Kit
- Consent Objects Data Kit
- Flows Integration Data Kit
- Email Channel Data Kit
The objective is to have all the Data Kit Objects Deployed.
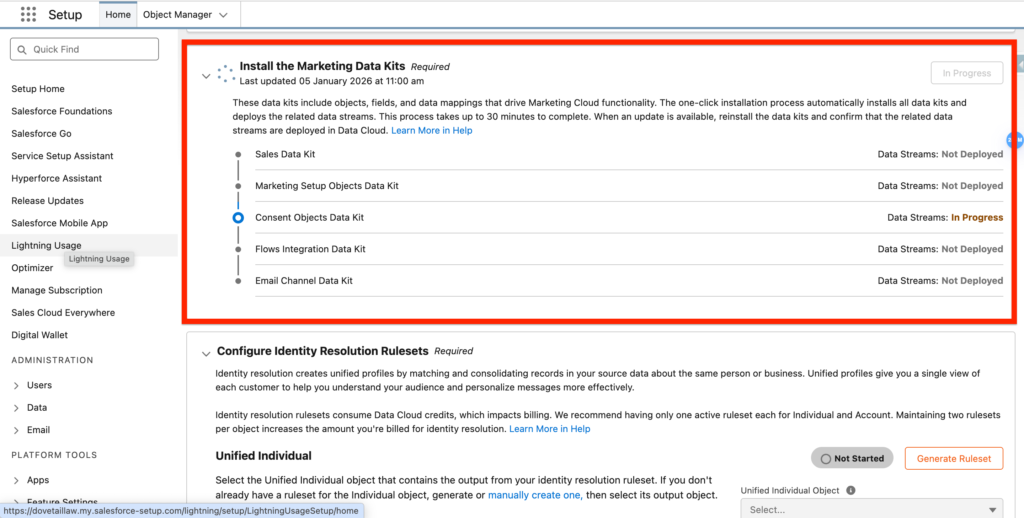
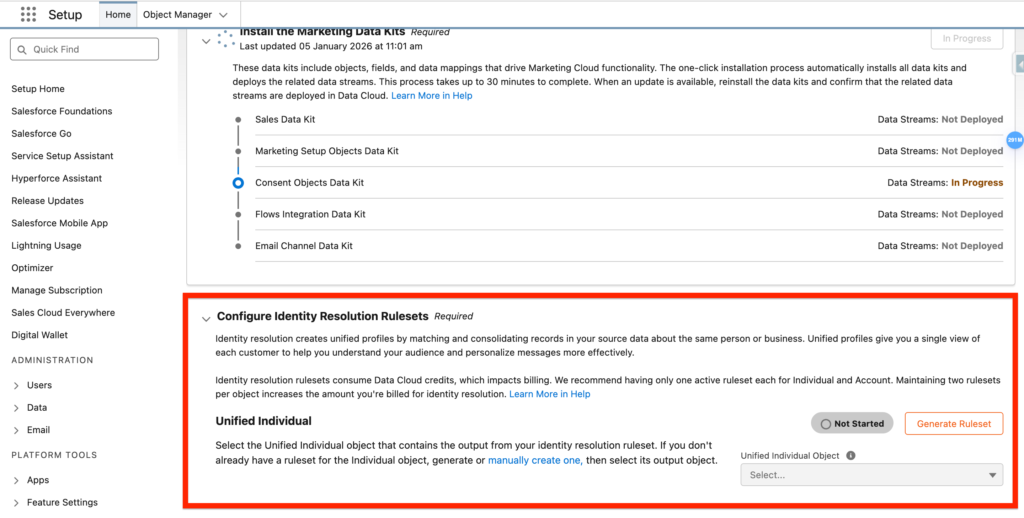
Configure Identity Resolution Rulesets #
The Identity Resolution Ruleset is a way to unify the individuals from all your external system. i.e. You might have a John Smith located in your Accounting Platform and a John Smith into your Customer Support Platform. If those 2 platforms are connected to Data Cloud you will have 2 John Smith that are existing even thought it is the same person. The Identity Resolution Ruleset allow you to detect that John Smith is a single person and create a sort of ‘Golden master John Smith’ that will be located into the ‘Unified Individual Object’. Link
Required Set-up #
Now that we have completed the Basic Setting, we will start the Required Set-up Items that includes: Email and Marketing Performance
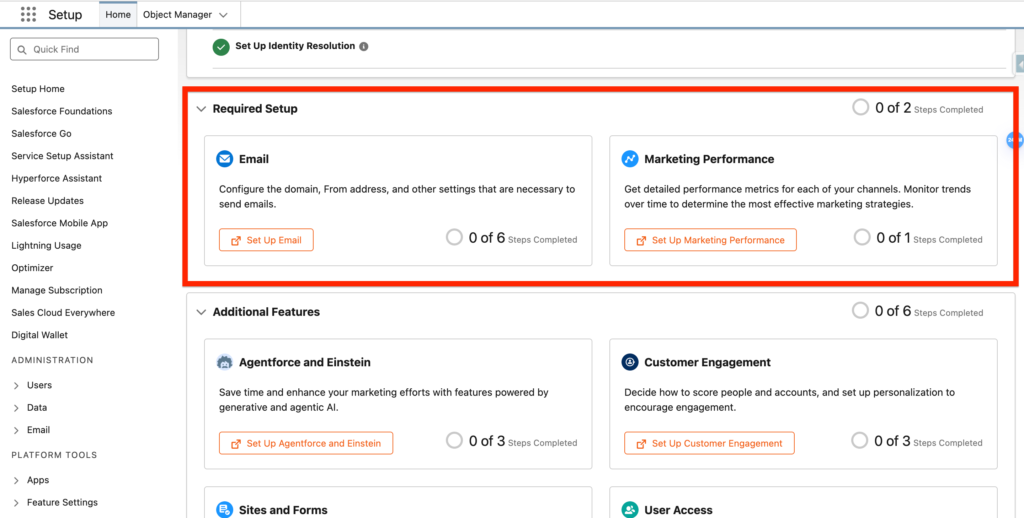
Email #
The Email set-up page contains 2 sections including Required Set-up and optional Set-up.
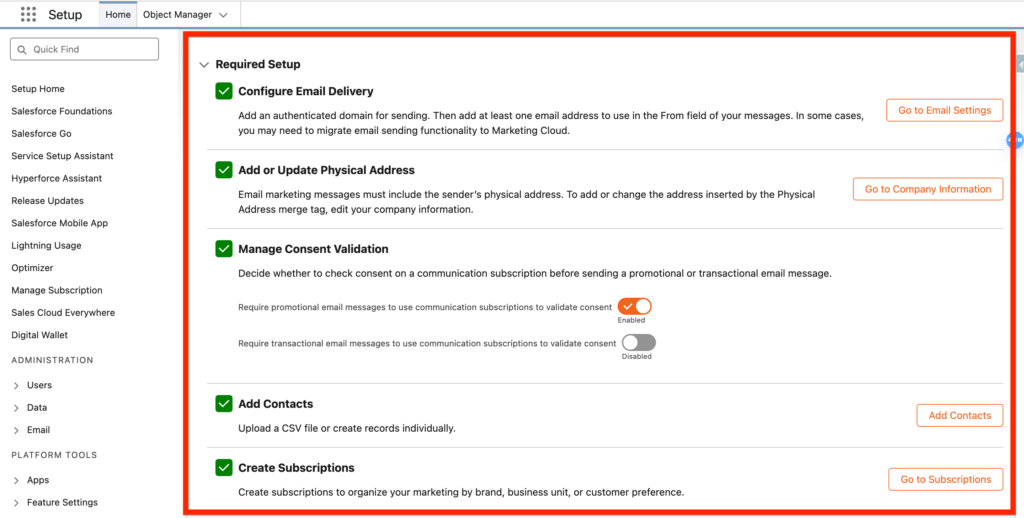
The Required set-up includes:
- Configure Email Delivery: What should be the email sending domain set-up? i.e. email.company.com
- Add or Update Physical Address: What is the address of your organisation?
- Manage Consent Validation
- Add Contacts: Does all contacts / Leads from Sales/Service Cloud should be added to Marketing Cloud Advanced?
- Create Subscriptions: Do you have different categories of newsletters/Communications?
- Add or Update Consent Records: How to know if these Contacts / Leads are opt-in? Is there a specific field?
Most of the set-up here is straightforward, the most complex part is to configure the email sending domain.
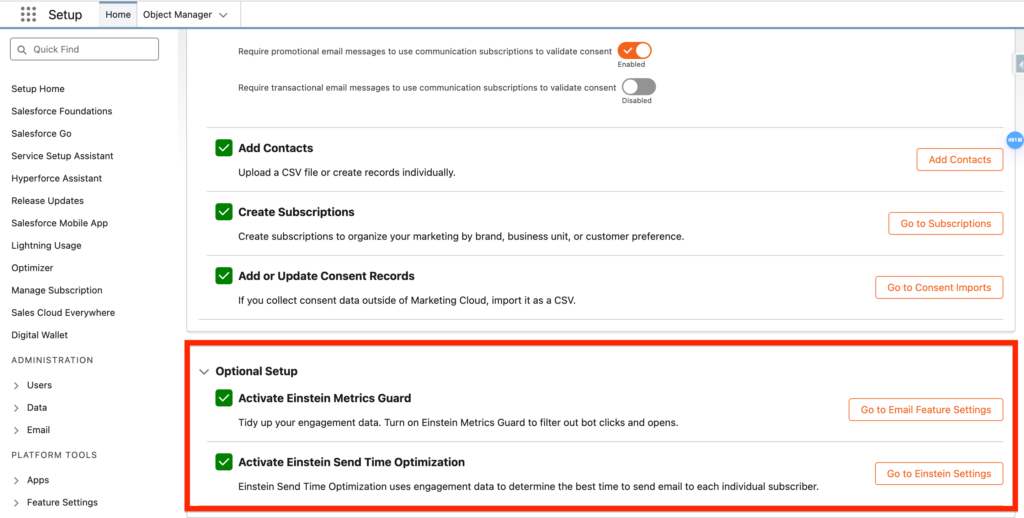
The Optional set-up includes:
- Activate Einstein Metrics Guard: Remove Bots Engagement Data
- Activate Einstein Send Time Optimization: Allow Einstein to Recommend based Sending Time based on how you audience engage with Emails.
Those feature are very easy to enable, just a click required.
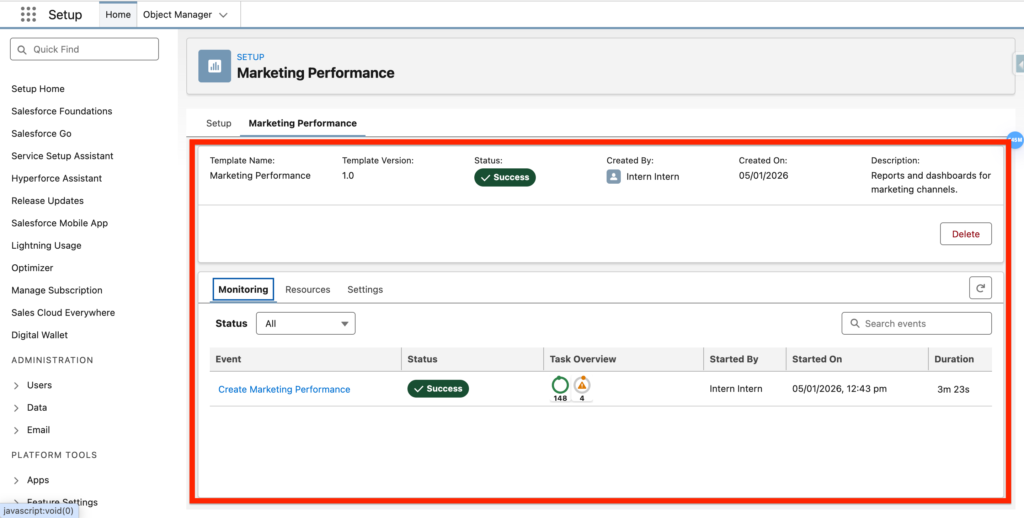
Marketing Performance The prerequisites to enable the Marketing Performance features are:
- Install the Marketing Data Kits (already installed before)
- (Optional) Set Up Salesforce Personalization
- (Optional) Configure Web Tracking
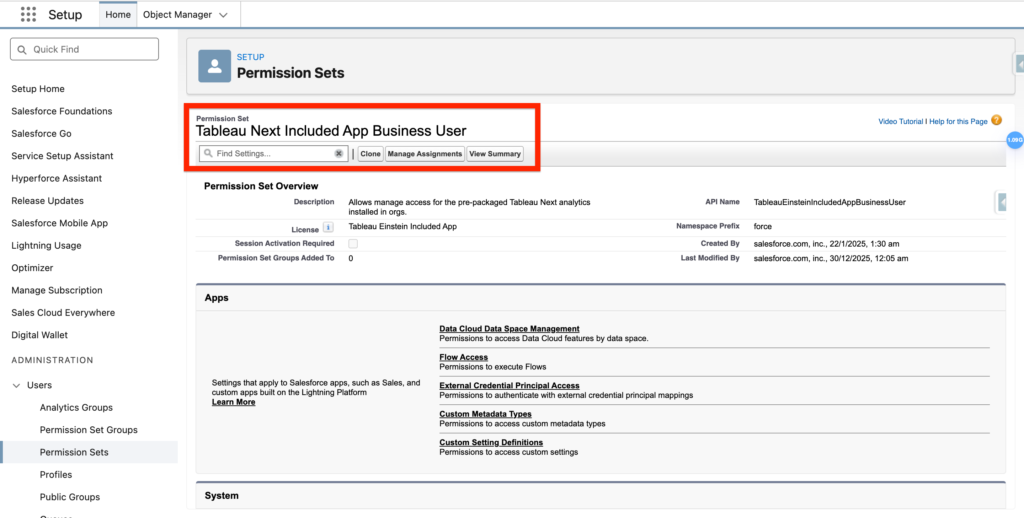
We associated the Tableau Next Included App Business User permission set to our user in order to visualise the Marketing Performance Dashboard.
Once the Marketing Performance are installed and configured you will be able to visualise the Marketing Performance feature enabled:
Additional Features #
The Additional Features to set-up are key in Marketing Cloud Growth.

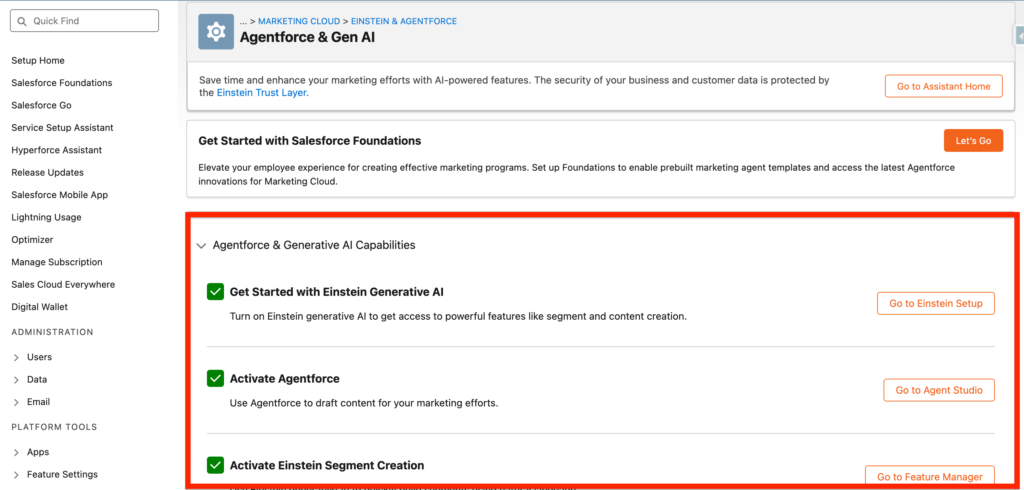
Agentforce and Einstein #
Everything related to AI is located within the Agentforce and Einstein section. Most of the features are just toggles that needs to be enabled:
- Get Started with Einstein Generative AI: Enabling AI possibilities/Feature within the Salesforce org.
- Activate Agentforce: Enabling the possibility to create AI Agent
- Activate Einstein Segment Creation: Creating Segments in Marketing Cloud Growth with Natural Language.
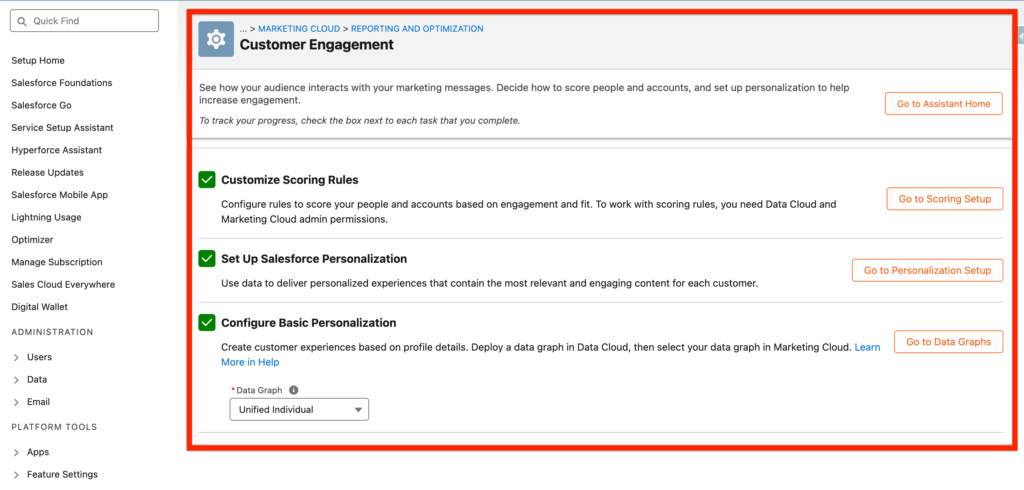
Customer Engagement #
The customer Engagement Part allows you to create Scoring Rules (Used to be scoring and grading in Account Engagement), set-up Salesforce Personalization and Populate a Data Graph in order to Personalise Email Templates with Merge fields.
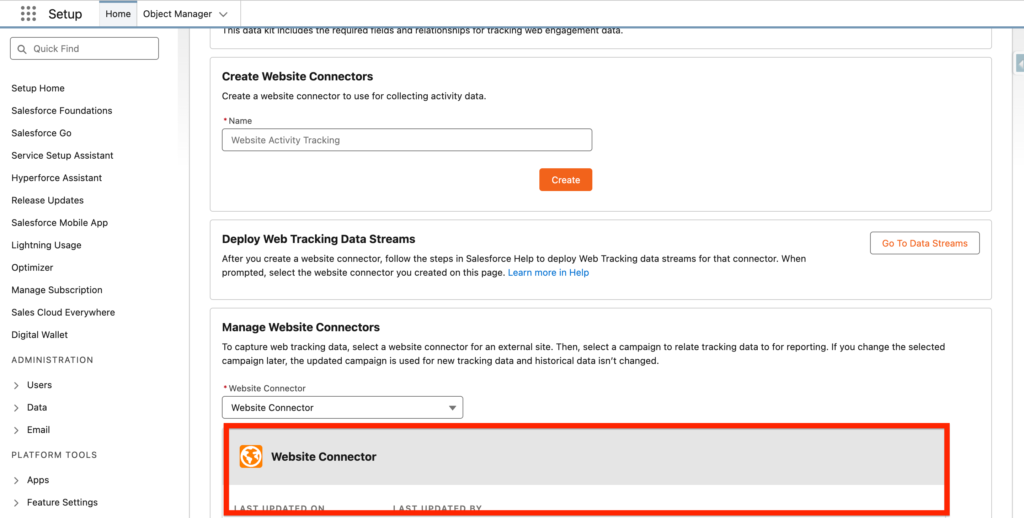
Sites and Forms #
This part is about setting-up the Tracking on Marketing Cloud landing pages, and external website.
Within Web Tracking:
- Add Integrations: To Data Cloud and Google ReCaptcha on order to capture data from Landing pages.
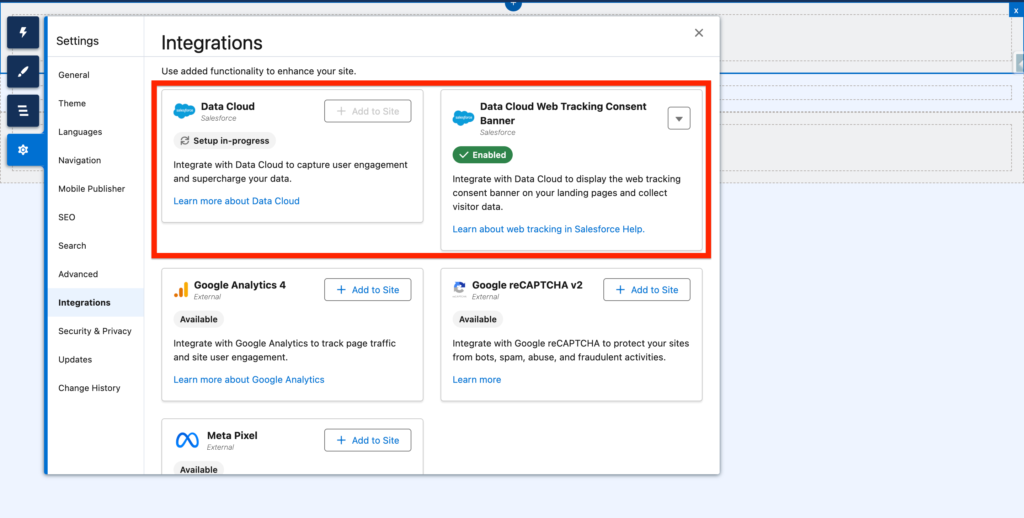
- Set Up Web Tracking: Create a Connector that can be embedded on external webpage and collect Data Throughout Data Cloud.
Within Use Forms on External Sites:
- Add a Third-Party Domain: Add your domain to CORS Allowed Origin List
- Allow Scripts on External Sites: Allow your form to be iframed into your website
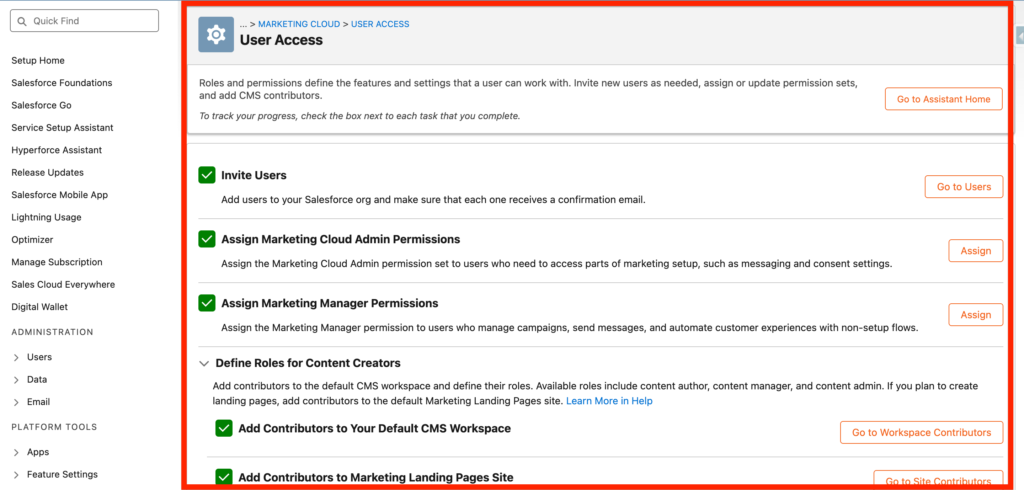
User Access #
The user Access part allows you to invite new users to Salesforce, give them the Marketing Cloud Admin and/or Manager Permissions sets and give them an access to the Salesforce CMS (Content Repository). Here are the main differences between the Marketing Cloud Permissions sets:
- Marketing Cloud Admin: Access to Salesforce Setup, Agentforce Admin, Prompt Template Manager, and full control on campaigns, segments, and flows.
- Marketing Cloud Manager: Full control to manage campaigns, segments, and campaign (non-admin) flows, and access to use Agentforce and Prompt Templates.
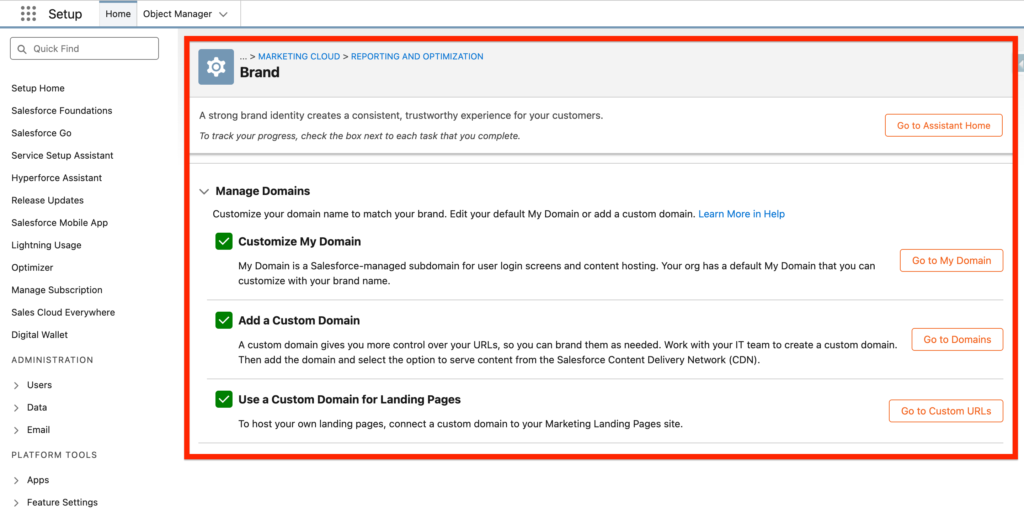
Brand #
The Brand section allows you to personalise your Salesforce instance with a custom url that includes your domain such as **company.my.salesforce.com** and also set-up a custom domain so that when you build landing pages within Marketing Cloud Growth the landing page is using your domain for the url instead of a generic Salesforce domain.
Page Customization #
The possibility to add Lightning Web Components (Widgets) on the Contact, Lead, Prospect, and Campaign page layouts. This is something similar to what we had in Account Engagement with the Account Engagement History Widget.
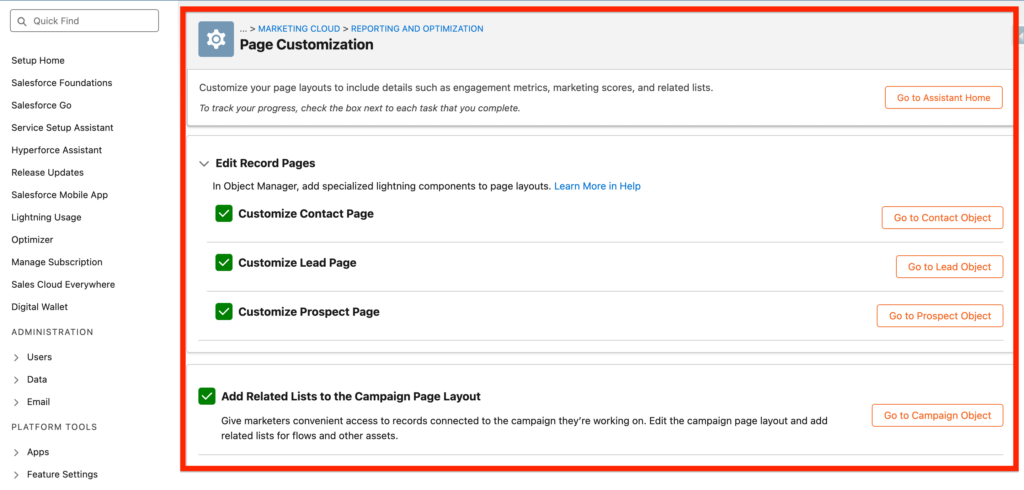
Here are the different Lightning Web Components available in the Marketing Cloud Growth:
- Privacy Consent Status: A list of subscriptions and consent values
- Data 360 Profile Engagement: A table of engagement metrics from automations and messaging channels
- Data 360 Profile Insights: A numerical score that indicates someone’s level of engagement


