The Consent system in Marketing Cloud Next is different from the other Marketing Platform owned by Salesforce. When a new Lead or Contact enter the Salesforce system it will be automatically set as opted-out and an action will need to be made in order to opt-in the record. This Option can be either manual or automated.
Manual Opt-in Process #
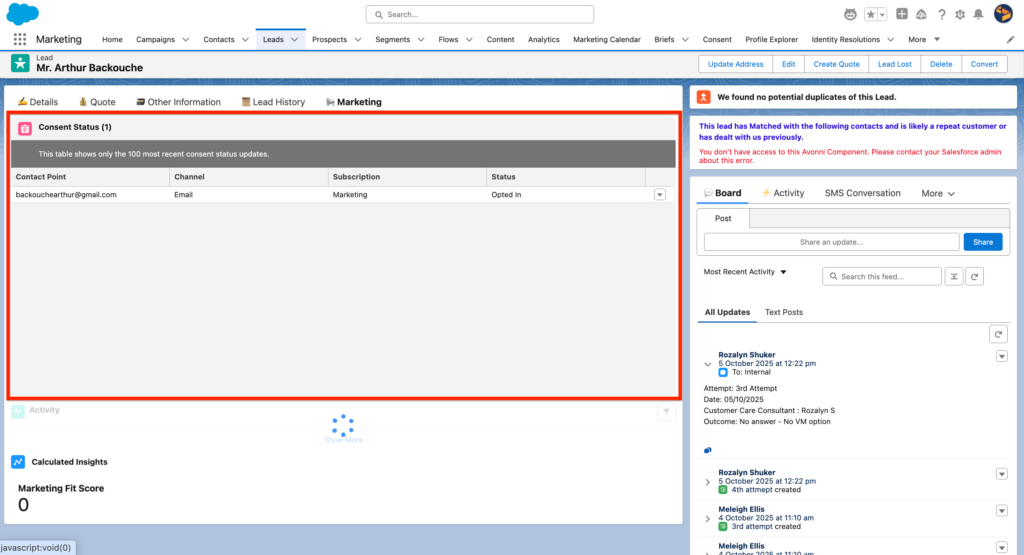
You should be able to add the following Consent Status widget on the Lead/Contact Page Layout. After clicking on the arrow you will need to update the Satus of the Lead/Contact.
Automated Opt-in Process #
Understanding Consent Field Requirements #
When creating consent records, whether through imports or automation, the following key fields are required:
- Channel: The communication delivery method (Email or SMS)
- Communication Subscription: The specific subscription name (e.g., “Newsletter”)
- Consent Status: Indicates whether an individual has opted in or out at the subscription level
- Email: The individual’s email address
- Consent Date: The timestamp when consent was captured
The Critical Field: Communication Subscription Consent Id #
This field is essential for creating consent records programmatically. It combines two elements:
- The email address
- The Communication Subscription Channel Type Id
- Separated by a “#” symbol
Example Format:
#0eBHs0000010zyOMAQ
Understanding Communication Subscription Fields #
There are two similar but distinct fields you need to understand:
Communication Subscription #
- Format:
0XlHs00000111ZZKAY - Purpose: References only the subscription itself
- Scope: Channel-agnostic
Communication Subscription Channel Type Id #
- Format:
0eBHs00000111n0MAA - Purpose: References both the subscription AND the specific channel
- Scope: Channel-specific
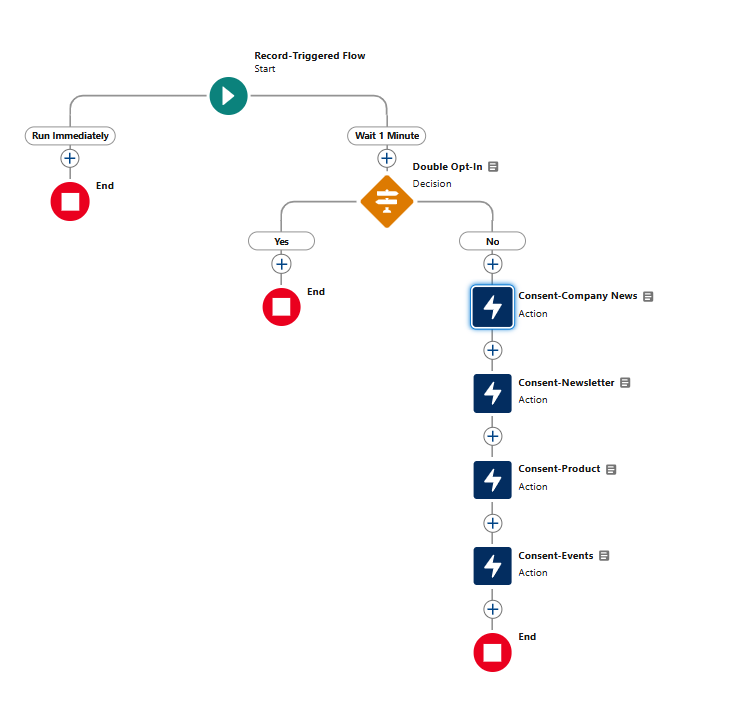
Building Your Record-Triggered Flow #
Before you begin, consider these questions:
- Which object should trigger the flow?
- When should the flow execute?
- What entry conditions are needed?
- Are there jurisdictions requiring double opt-in?
Step 1: Configure the Start Element #
Recommended Configuration:
- Trigger: When a record is created
- Object: Lead
- Entry Conditions: Exclude leads created from form submissions (since Marketing Cloud on Core forms already handle consent)
- Optimization: Set to “Fast Field Updates”
Customize these conditions based on your specific requirements.

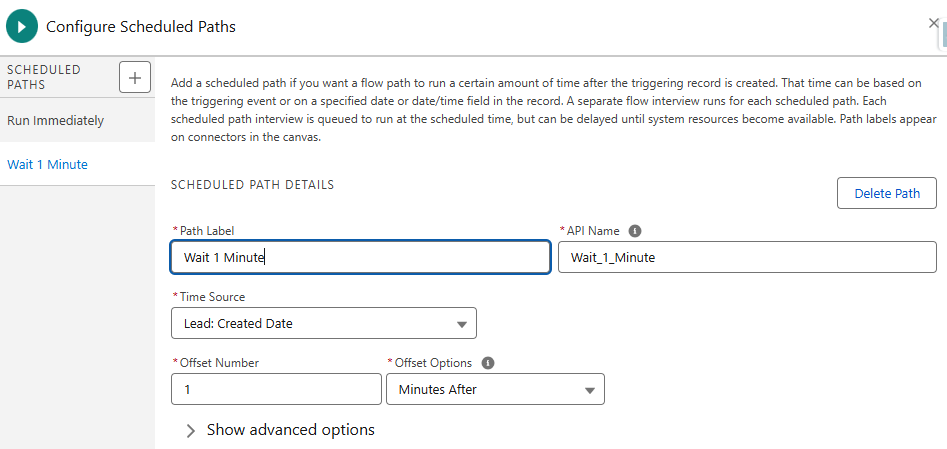
Step 2: Add a Scheduled Path #
Record-triggered flows cannot execute external callout actions in paths that run immediately. To work around this limitation:
- Add a scheduled path
- Set a 1-minute delay from when the lead was created
- This allows the flow to process the consent action properly
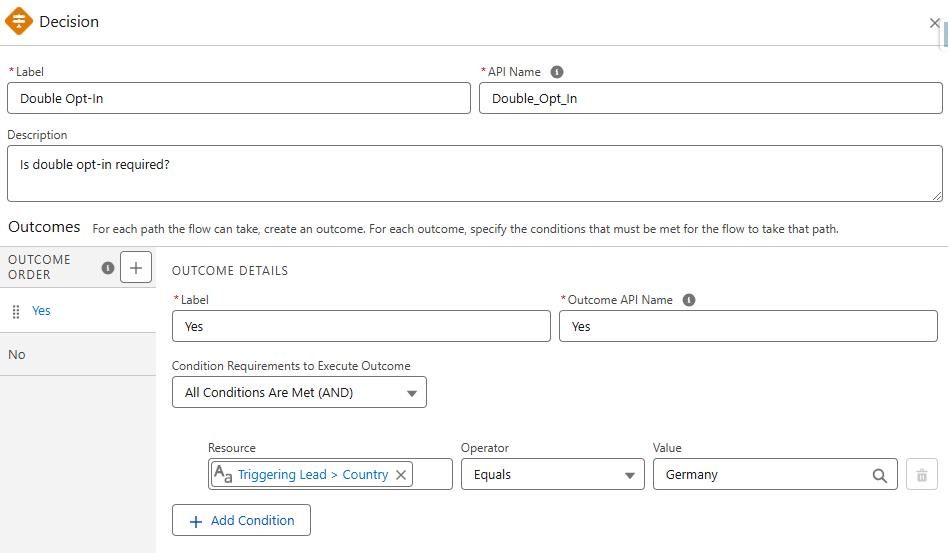
Step 3: Create a Decision Element (Optional but Recommended) #
For jurisdictions requiring double opt-in:
- Add a decision element to identify leads from these regions
- Route them down a separate path
- This allows you to add future actions, such as sending a transactional email requesting explicit consent
Example Criteria:
- Country equals specific values (e.g., Germany, Canada)
- State equals specific values (e.g., California, Virginia)
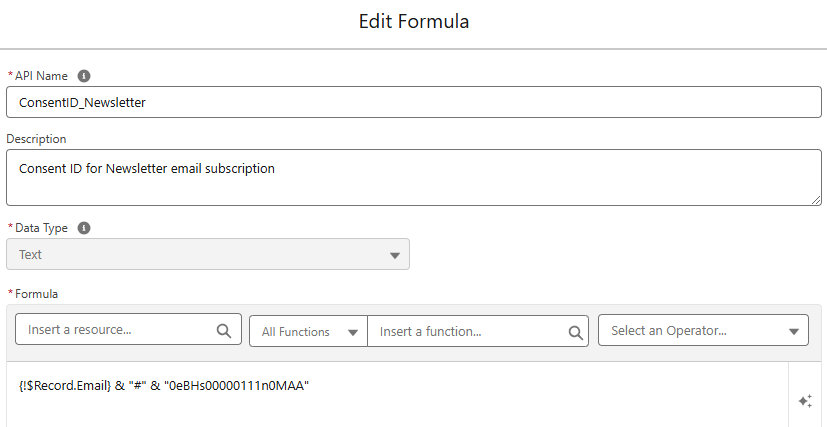
Step 4: Build Formula Resources #
You’ll need formula resources to generate the Communication Subscription Consent Id for each subscription/channel combination.
Formula Template:
{!$Record.Email} & "#" & "0eBHs00000111n0MAA"
Create one formula resource per Communication Subscription Channel Type Id you’re managing.
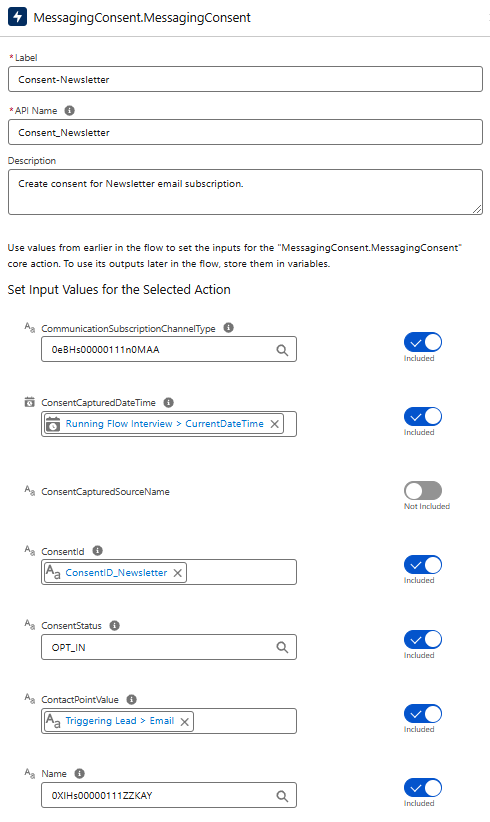
Step 5: Configure Action Elements #
Use the built-in MessagingConsent.MessagingConsent action provided by Salesforce.
Required Inputs:
- CommunicationSubscriptionChannelType (recommended)
- The Id relating to both subscription and channel
- Example:
0eBHs00000111n0MAA
- ConsentCapturedDateTime
- Use
{!$Flow.CurrentDateTime}or the lead creation date
- Use
- ConsentId
- Use your formula resource that concatenates email and Channel Type Id
- ConsentStatus
- Set to
OPT_INorOPT_OUTas appropriate
- Set to
- ContactPointValue
- The email address:
{!$Record.Email}
- The email address:
- Name (recommended)
- The Communication Subscription Id (channel-agnostic)
- Example:
0XlHs00000111ZZKAY
Note: While some fields are technically optional, including all values ensures your records match those created through standard consent imports.
Important: Create one action element for each subscription/channel combination you need to manage.
Step 6: Complete Your Flow Path #
Connect all elements in logical sequence:
- Start Element
- Scheduled Path (1-minute delay)
- Decision Element (if using)
- Action Elements (one per subscription)