
In Agentforce Marketing (Marketing Cloud Next), it is possible to trigger Flows directly from the REST API. This capability allows a Flow to start within approximately 30 seconds after an API event, enabling near real-time actions.
This is particularly useful for transactional communications such as confirmation SMS or emails. For example, when a customer completes a purchase on a Shopify website, the purchase event can trigger a Flow via the API, allowing the confirmation SMS to be sent within about 30 seconds of the transaction.
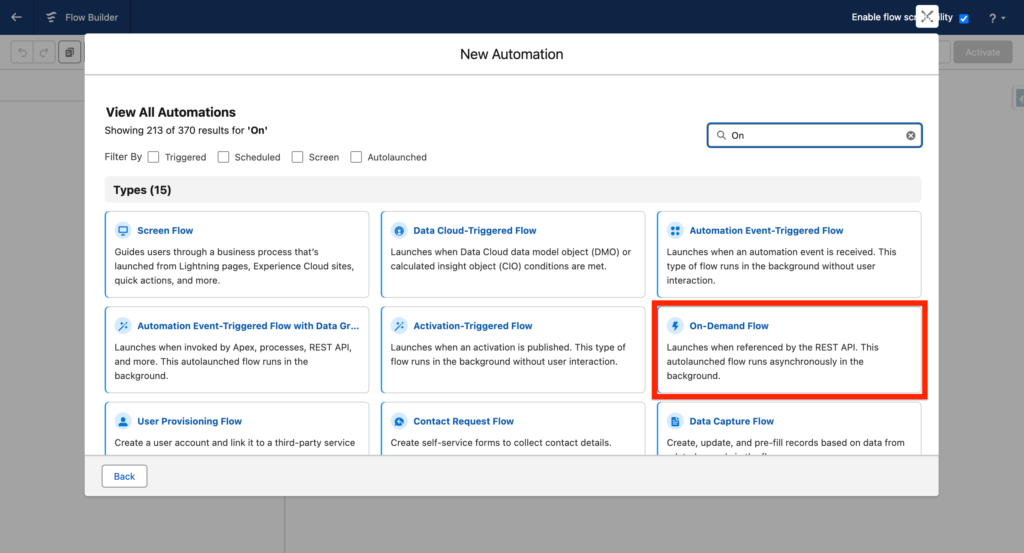
Creating the On-Demand Flow #
Navigate to the Flow tab in Marketing Cloud Next and search for On-Demand Flow when creating your new flow.
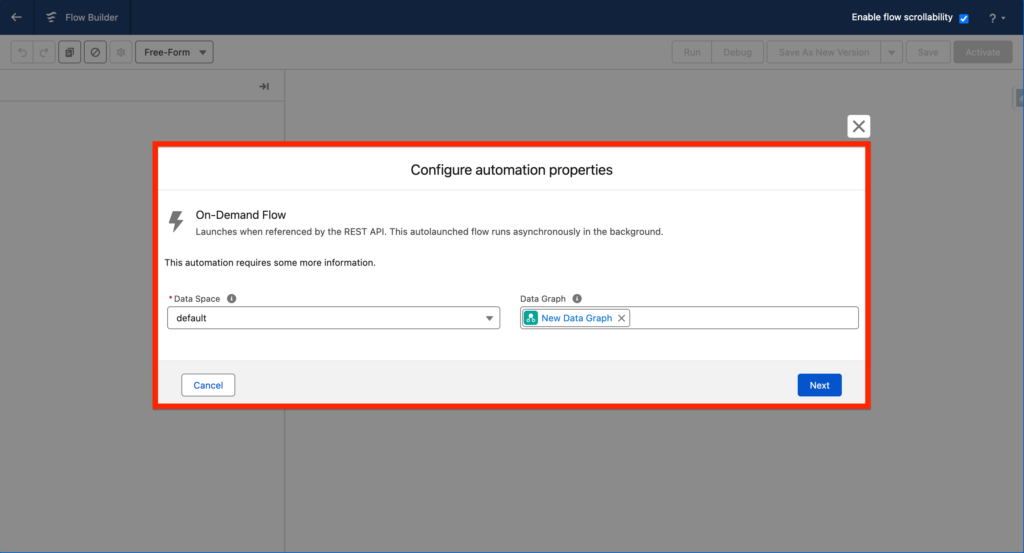
In the next step, you will be asked to select a Data Graph. I’ve written multiples articles about Data Graphs – in a nutshell, Data Graphs are built to allow you to access information fast within Data 360 (Data Cloud).
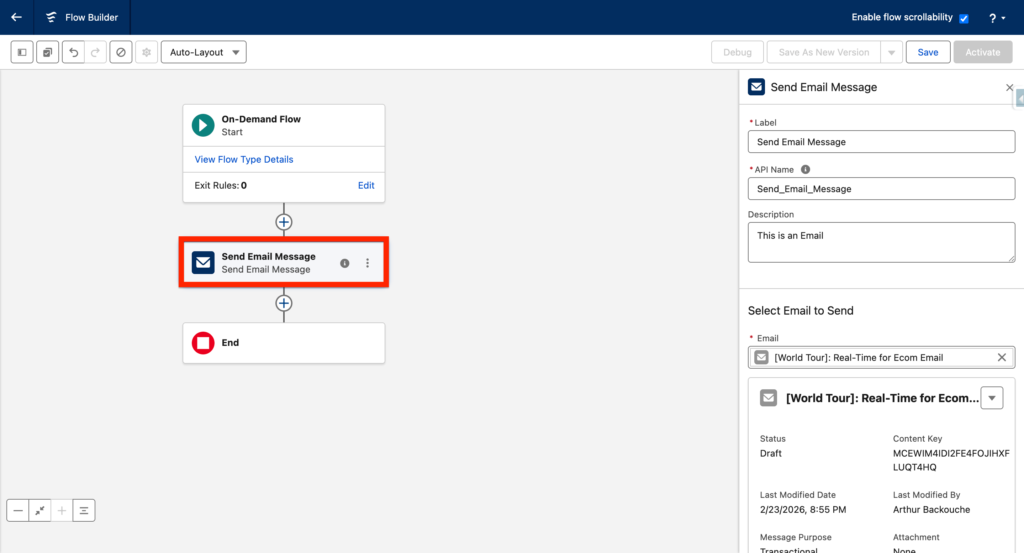
I will add an email component so that when the flow is triggered via API – I will receive an email directly in my inbox. Then I will save and activate the flow.
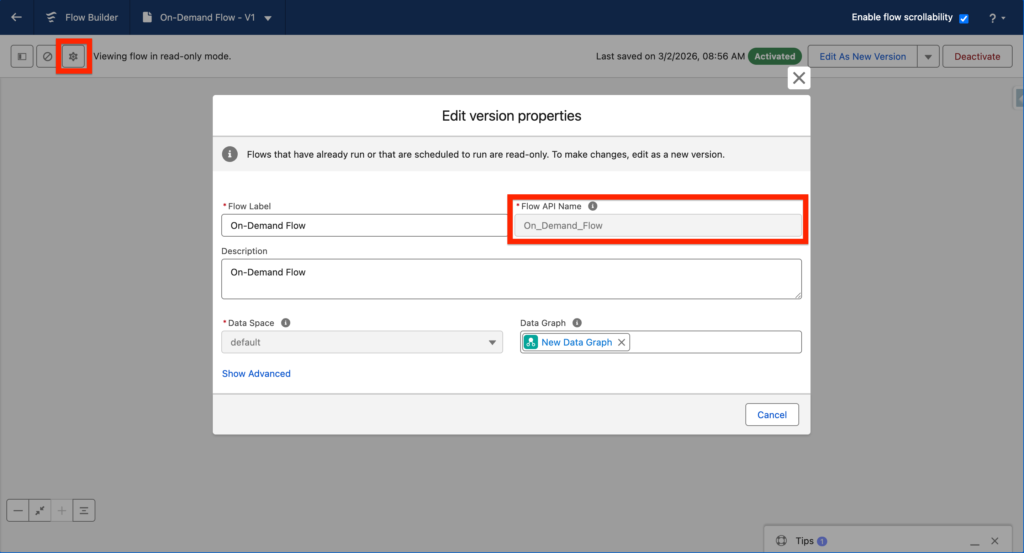
Click on the Gear to edit version properties and then copy the Flow API Name as it will be needed for the next steps: On_Demand_Flow.
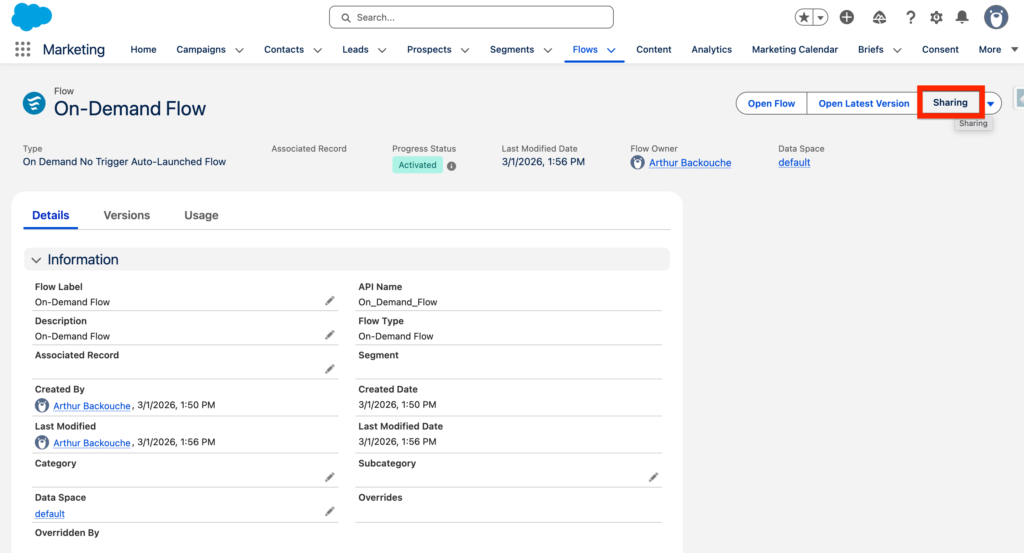
Now something very important that I’ve found is that the flow must be shared with the user that will send it throughout the API. Go on the Flow you just created and click Sharing, then select the user that will be used to send it throughout the API – also make sure the user is a Flow User.
Creating the Salesforce External App: #
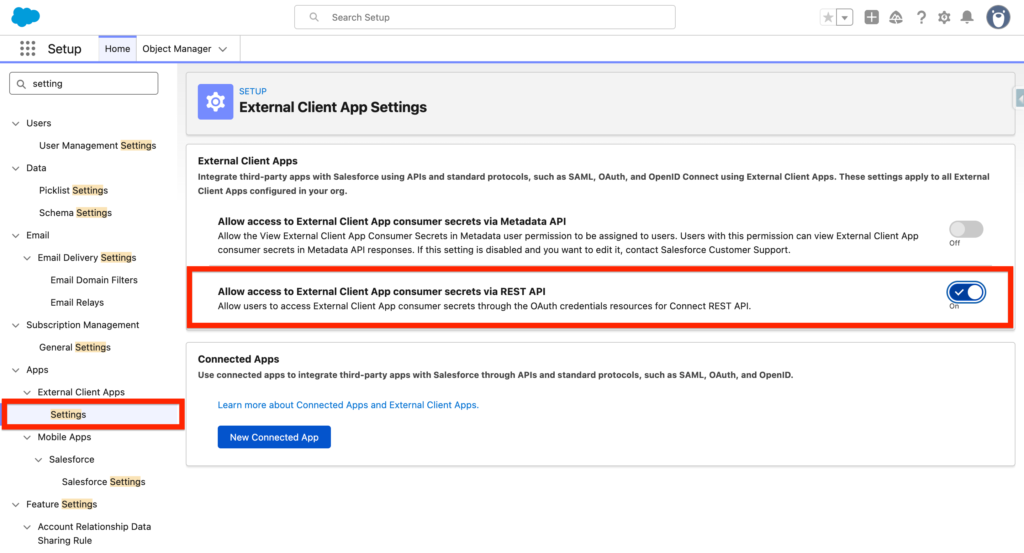
In Salesforce Set-up, search for External Client Apps > Settings and then enable the feature ‘Allow access to External Client App consumer secrets via REST API’
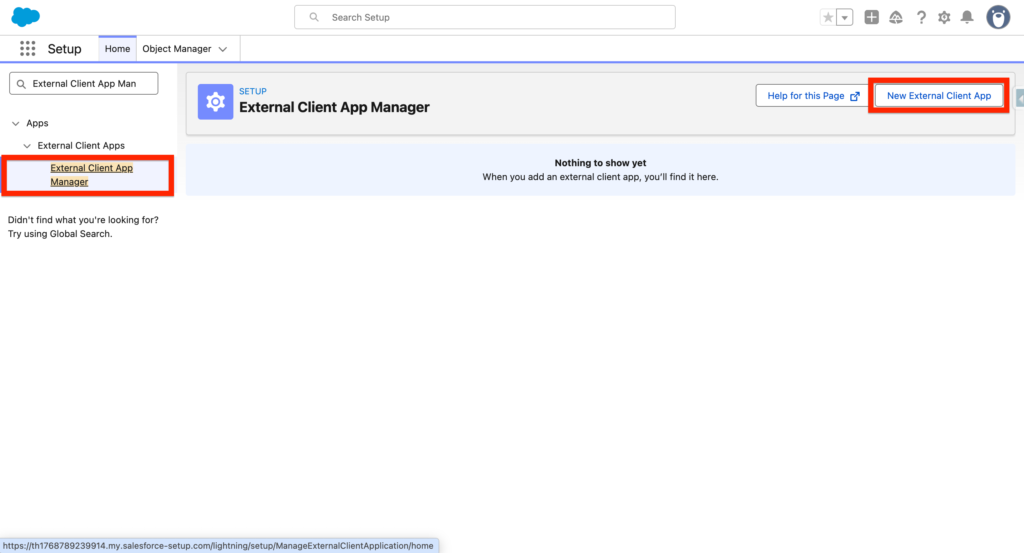
Next, search for External Client App Manager and click New.
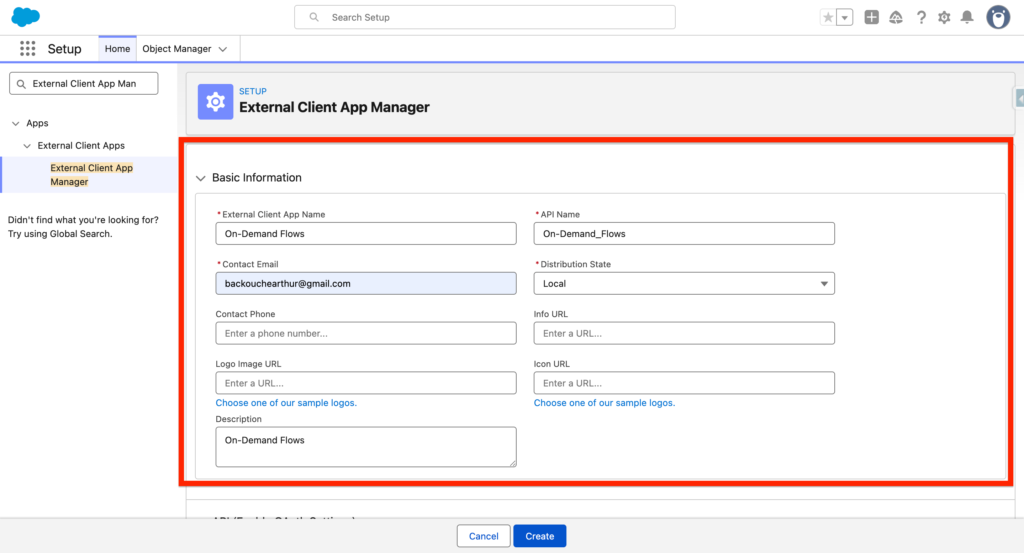
On your External Client App Manager, enter the following information:
- External Client App Name: mine is OnDemandFlows
- Contact Email: mine is [email protected]
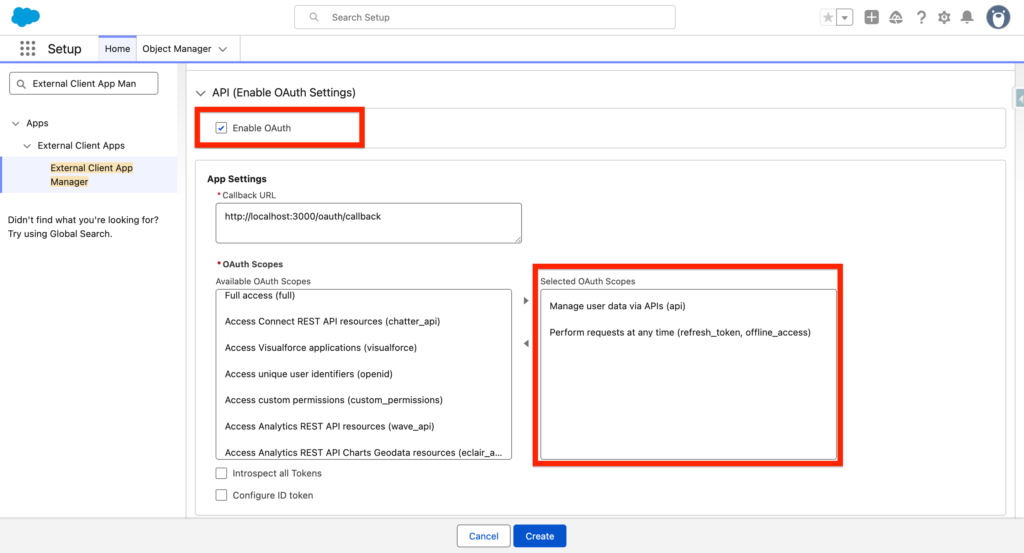
On the API Section, select the following:
- Enable OAuth: True
- Callback URL: http://localhost:3000/oauth/callback
- OAuth Scopes: Manage user data via APIs (api), Perform requests at any time (refresh_token, offline_access)
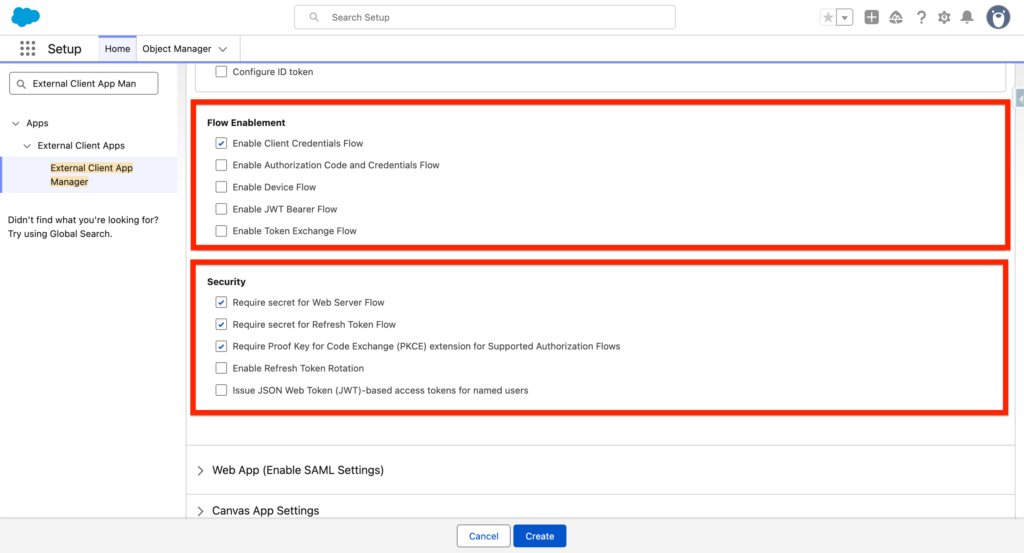
- Enable Client Credentials Flow: True
- Require secret for Web Server Flow: True
- Require secret for Refresh Token Flow: True
- Require Proof Key for Code Exchange (PKCE) extension for Supported Authorization Flows: True
You can now click Create.
—
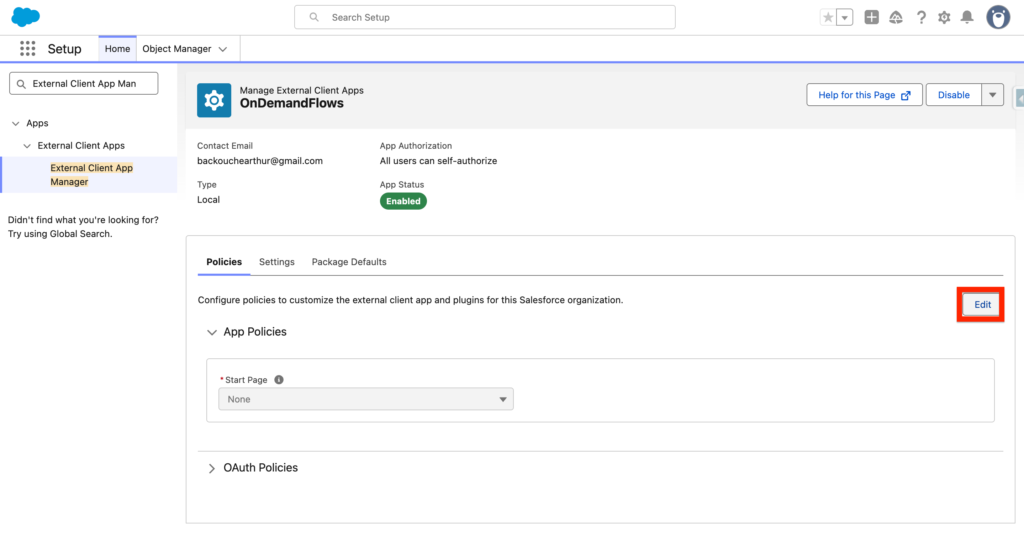
Next, click edit Policies on the External Client App we just created.
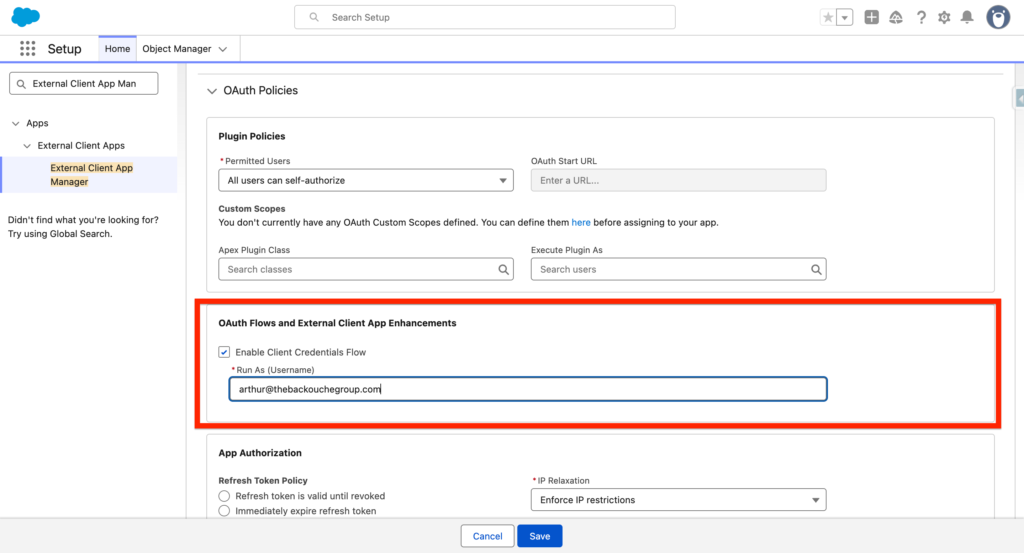
Within the OAuth Policies section of the External Client App check the tick-box Enable Client Credentials Flow and write your Salesforce Username (mine is: [email protected]).
Next navigate to settings, and click on ‘Consumer Key and Secret’
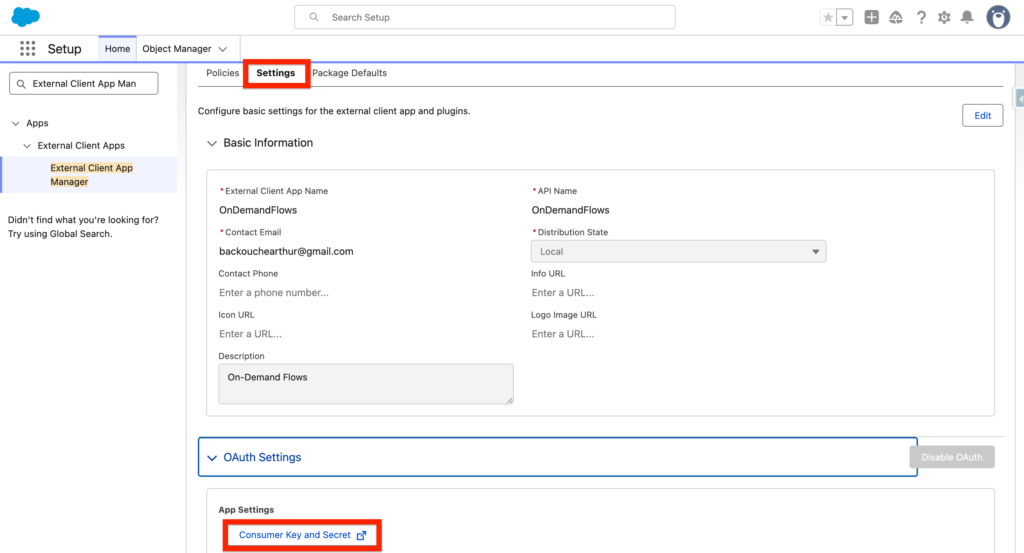
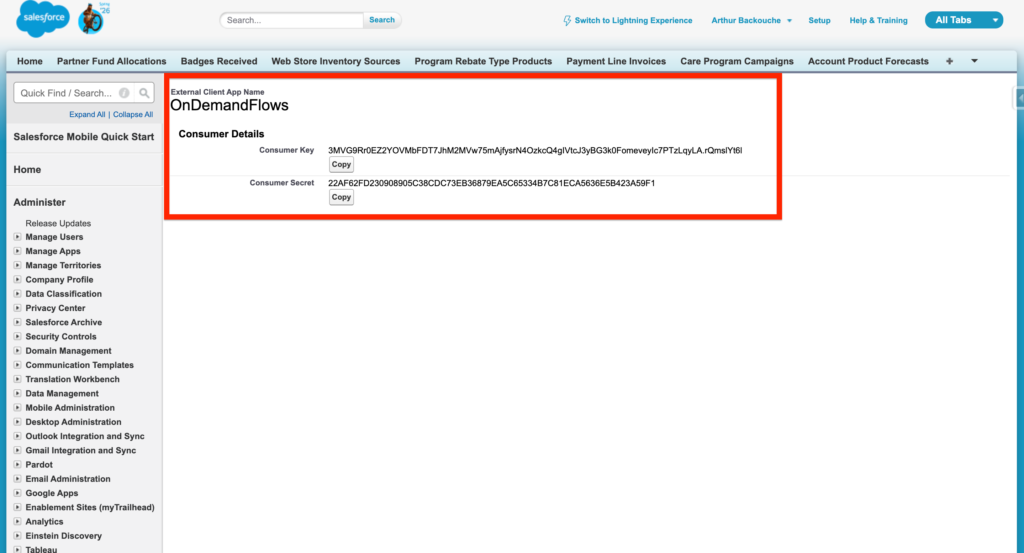
You will be able to access the Consumer Key and Secret of your External Client App.
Requesting the the Access Token #
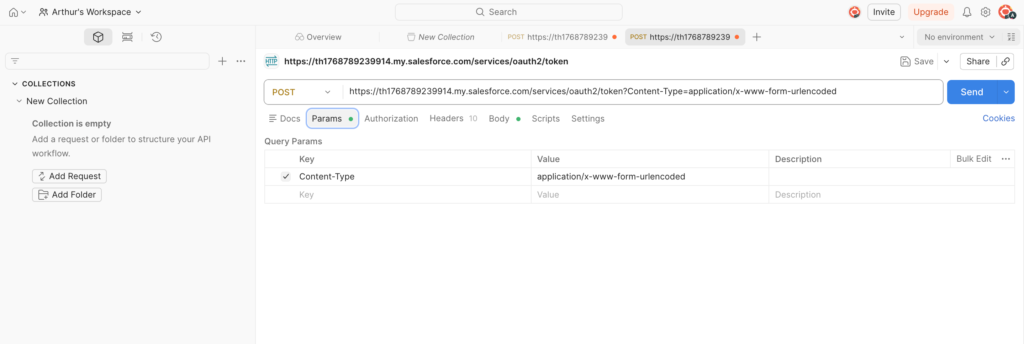
We will need to request the access token in order to deliver trigger the flow via API. In Postman, we will be creating an HTPP POST Request: with the following URL: https://th1768789239914.my.salesforce.com/services/oauth2/token – You will need to replace th1768789239914 with your My Domain name. The request will also need to contain the following header:
- Content-Type: application/x-www-form-urlencoded
And the body must contain:
- grant_type: client_credentials
- client_id: 3MVG9Rr0EZ2YOVMbFDT7JhM2MVw75mAjfysrN4OzkcQ4..
- client_secret: 22AF62FD230908905C38CDC73EB36879EA5C6533..
—
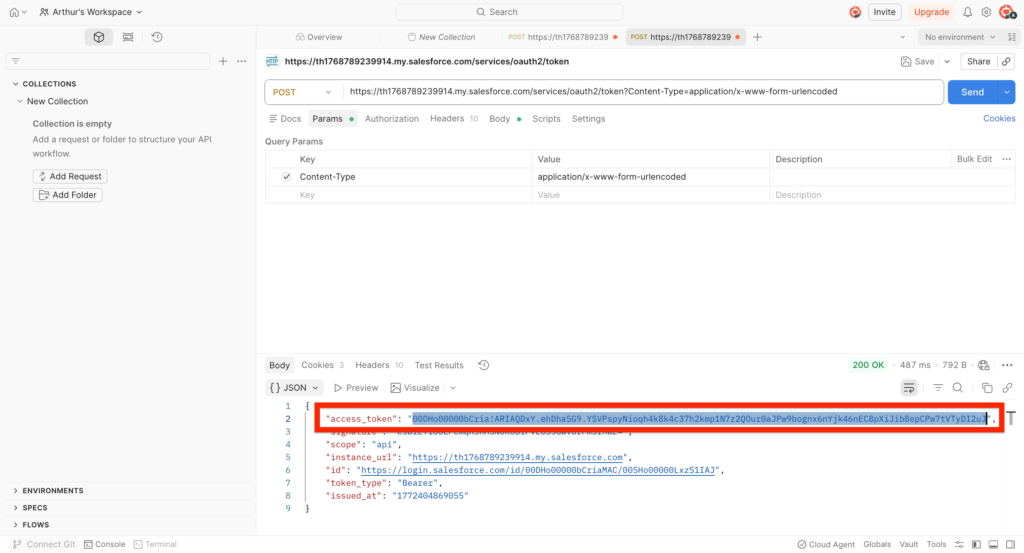
The access Token will be returned – Make sure to copy it:
- access_token: 00DHo00000bCria!ARIAQLHL24jZDQfB6GLHqkX..
Triggering the Flow via REST API #
We will now be creating another HTTP POST Query in POSTMAN to Trigger the Flow via REST API. In order to build the API Query we will need the following information:
- Access Token: mine is 00DHo00000bCria!ARIAQLHL24jZDQfB6GLHqkXoYBXw..
- Flow API Name: mine is On_Demand_Flow
- My Domain name: mine is th1768789239914
The URL of the Query will be: https://th1768789239914.my.salesforce.com/services/data/
v65.0/actions/custom/flow/On_Demand_Flow
You will need to replace th1768789239914 with your My Domain name and On_Demand_Flow with the name of your flow.
The headers of your POST Query will contain:
- Content-Type: application/json
- Authorization: Bearer 00DHo00000bCria!ARIAQLHL24jZDQfB6GLHqkXoYBXw..
The Body of the flow will contain the recipient of the email: in my case it is:
{
"inputs" : [ {
   "EmailAddress" : "[email protected]",
   "IndividualId" : "003Ho00002AlRM8IAN"
   } ]
}
When the Query succeed – The code returned will be 200 – and email will be received in my inbox.

Resources: https://help.salesforce.com/s/articleView?id=platform.flow_concepts_trigger_on_demand.htm&type=5